

How to protect your Mac
What for: So you do not get hacked.
If you use a short or easy-to-guess password, hackers will be able to crack it and gain access to your computer. A long and complex password is more secure. A strong password complies with the following requirements:
- Is at least 8 characters long;
- Contains lowercase and uppercase letters, numbers, and special characters ($, @, etc.);
- Is not an actual word or easy-to-guess phrase;
- Is not the same as for any other account, including your Apple ID password;
- Does not consist of information that strangers could easily find out (your name, date of birth, pet's name, and so forth — or those of your friends or relatives).
To change your current password:
- Open the Apple menu by clicking the Apple emblem in the upper-left corner of the screen;
- In the drop-down list, select System Preferences;
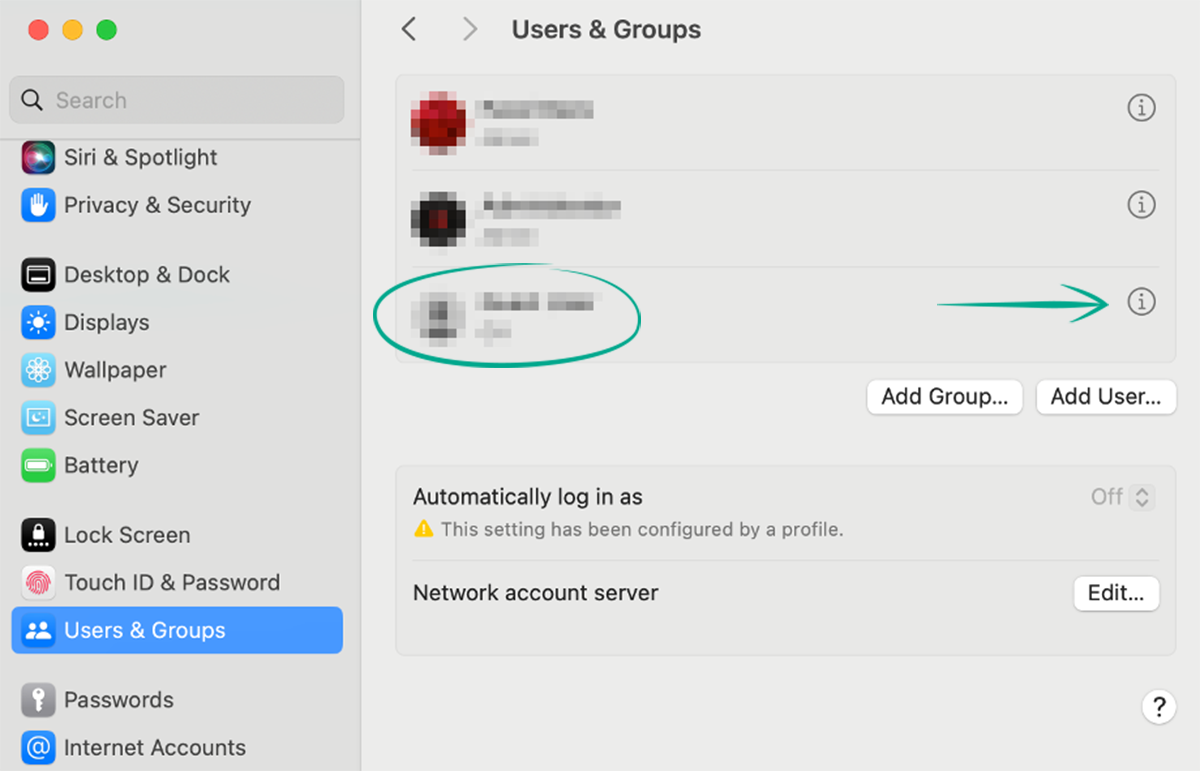
- Go to the Users & Groups section;
- If you previously enabled password protection for system-wide settings, the system will offer to unlock the settings. Enter your passcode or use your Touch ID to continue;
- Click the information button next to your user name;
- Click Change;
- Enter your current password, and then type in a new password in New Password and Verify;
- You can optionally create a password hint in case you lose your password. If you forget your password, you can click the question mark in the login field. After three incorrect password attempts, the hint will appear to help you remember your password. The hint should be something you can easily remember, but don't make it too easy for others to figure out;
- Click Change password;
- Click OK.
What for: To prevent strangers from gaining access to the system while you are away.
If you are not using the computer for a certain amount of time, macOS can lock it. In this case, the screen will show a login window and you will have to enter your password again to continue working on the computer. The sooner the computer is locked, the less chance that someone else will be able to use it.
To configure the time to wait before locking the computer:
- Open the Apple menu by clicking the Apple emblem in the upper-left corner of the screen;
- In the drop-down list, select System Preferences;
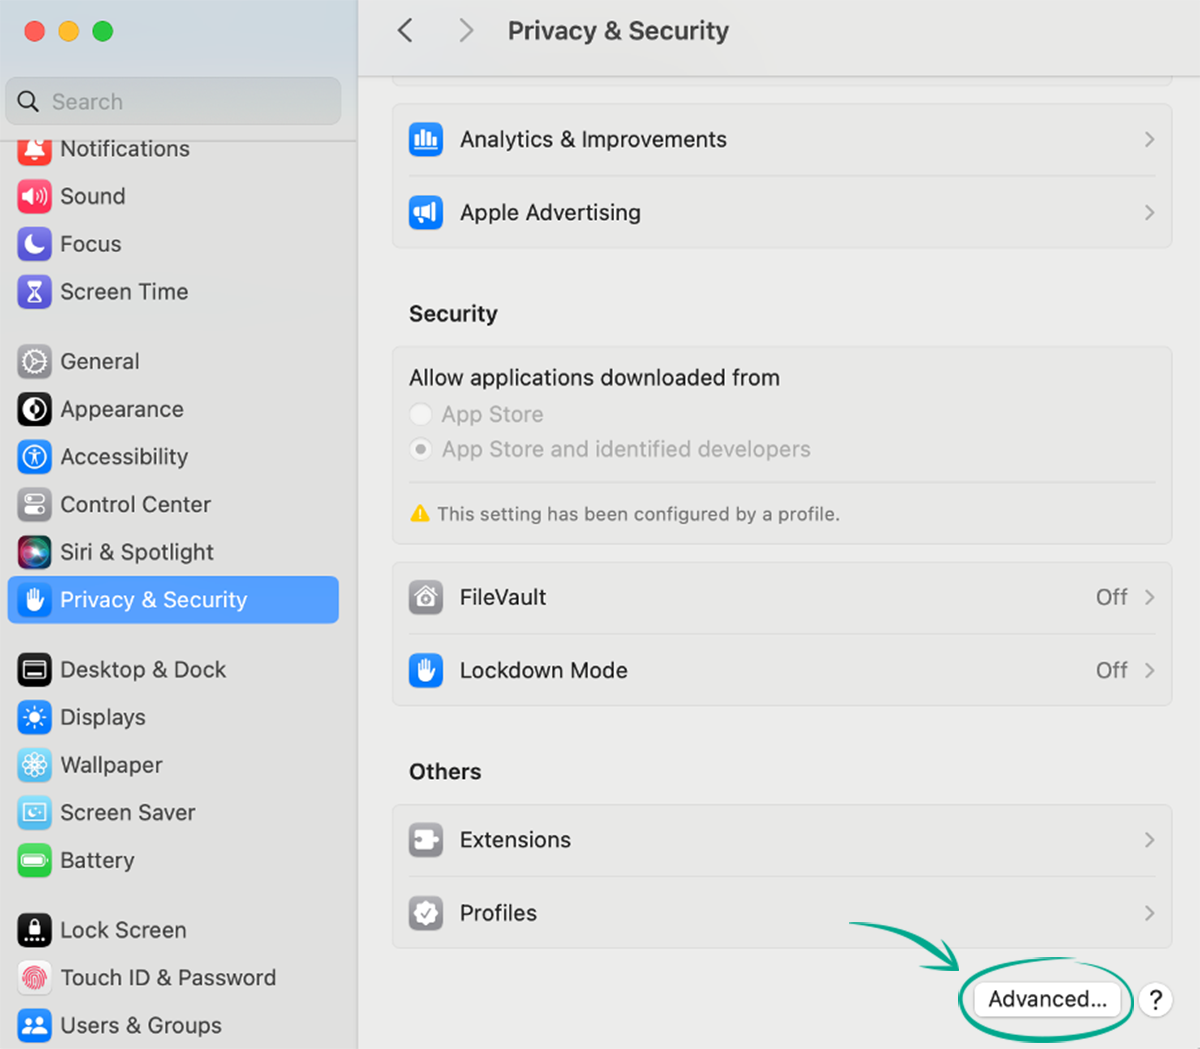
- Go to the Privacy & Security section;
- If you previously enabled password protection for system-wide settings, the system will offer to unlock the settings. Enter your passcode or use your Touch ID to continue. Click Advanced... in the bottom right corner of the window;
- Turn on Log out automatically after inactivity and set a time interval that works best for you;
- Click Done.
You can also configure the computer to lock when it goes to sleep: Here you can choose how long the computer will be in sleep mode before it asks you for a password when you attempt to unlock it.
- Open the Apple menu by clicking the Apple emblem in the upper-left corner of the screen;
- In the drop-down list, select System Preferences;
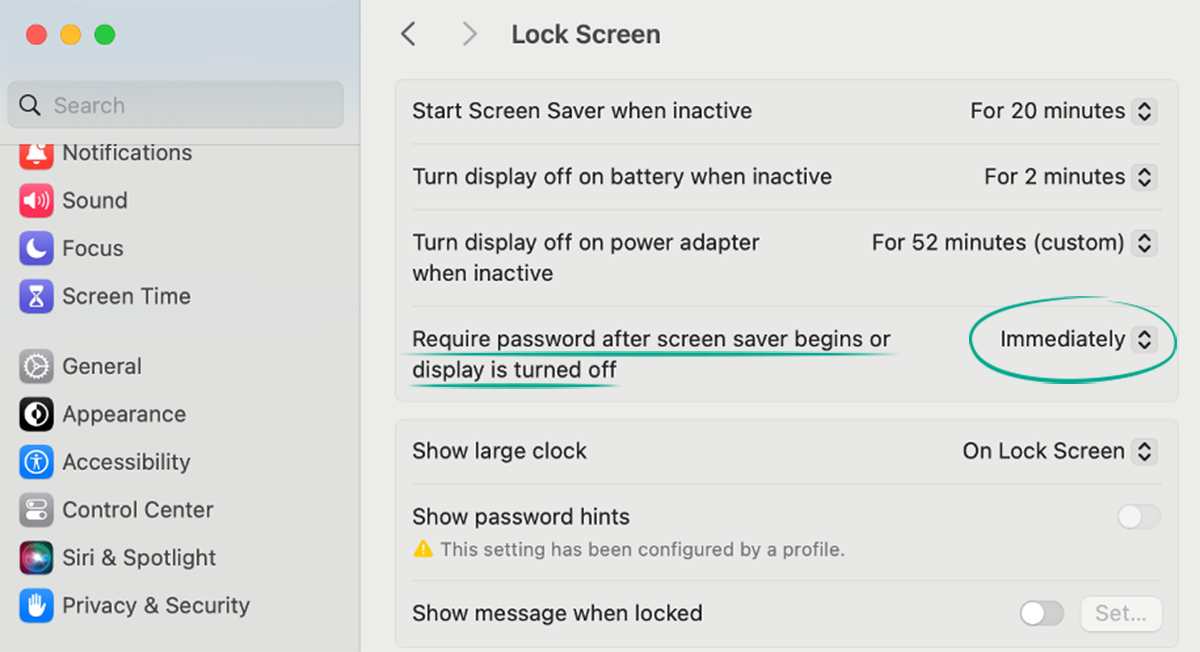
- Go to Lock Screen;
- If you previously enabled password protection for system-wide settings, the system will offer to unlock the settings. Enter your passcode or use your Touch ID to continue. Click the drop-down list next to Require password after screen saver begins or display is turned off and select a time interval that suits you.
If you set an interval that is too large and leave your computer unattended, other people will be able to use it.
What for: So that no one can change important settings on your computer.
If there are other people using your computer, you can prevent them from changing the system and security settings.
- Open the Apple menu by clicking the Apple emblem in the upper-left corner of the screen;
- In the drop-down list, select System Preferences;
- Go to the Privacy & Security section;
- If you previously enabled password protection for system-wide settings, the system will offer to unlock the settings. Enter your passcode or use your Touch ID to continue. Click Advanced... in the lower right corner of the window;
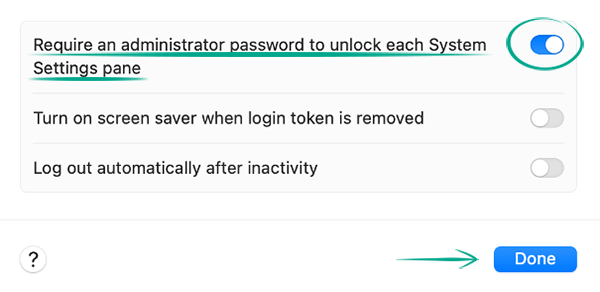
- Turn on Require an administrator password to unlock each System Settings pane;
- Click Done.
What for: To find your computer or erase its data in case it is lost or stolen.
The Find My Mac service will help you find your computer in case it is lost. You can use it to not only determine the location of your device and turn on its alarm, but also to remotely lock it or wipe its memory. This protects your data in case your laptop is stolen.
Activation Lock is also enabled when the Find My Mac service is turned on. This feature prevents someone from signing in to your system with a different Apple ID, turning off the Find My Mac feature, or wiping the memory without Apple ID password confirmation. That means if your computer ends up in someone else's hands, they will not be able to use it or sell it (except maybe for spare parts), as well as to disable search and lock functions.
Then you can find, lock, or wipe a lost or stolen computer by using the built-in Find My app on any other Apple device or at iCloud.com.
Please keep in mind that your Apple ID account credentials are also deleted along with the files when the drive is formatted, so in this case you will not be able to see the location of your computer. Therefore, use this option in extreme cases only.
However, when the lock is enabled, your Apple ID login and password are saved on Apple servers linked to your device ID. So, even after you erase all the data you will be able to unlock your lost and found Mac if you enter your Apple ID credentials on it.
The device search feature works even without Internet access and if location services are turned off. In this case, the computer sends a signal over Bluetooth that other nearby Apple devices receive. After receiving this signal, these devices send their location to Apple and the company forwards this data to your account. Using this feature, you will be able to see the approximate location of your computer in the Find My app.
To enable the Find My Mac feature:
- Open the Apple menu by clicking the Apple emblem in the upper-left corner of the screen;
- In the drop-down list, select System Preferences;
- Go to Internet Accounts;
- Select the iCloud account:
- If you don't have an iCloud account, click Add Account...;
- Type in your credentials and click Next;
- Check the box to say you've read the Terms and Conditions and click Accept;
- Enter the verification code the system has sent to the device you registered for two-factor authentication.
- Allow Apple to track your location. Select Find My Mac under Apps Using iCloud. If you can't see it on the list, click Show More Apps...;
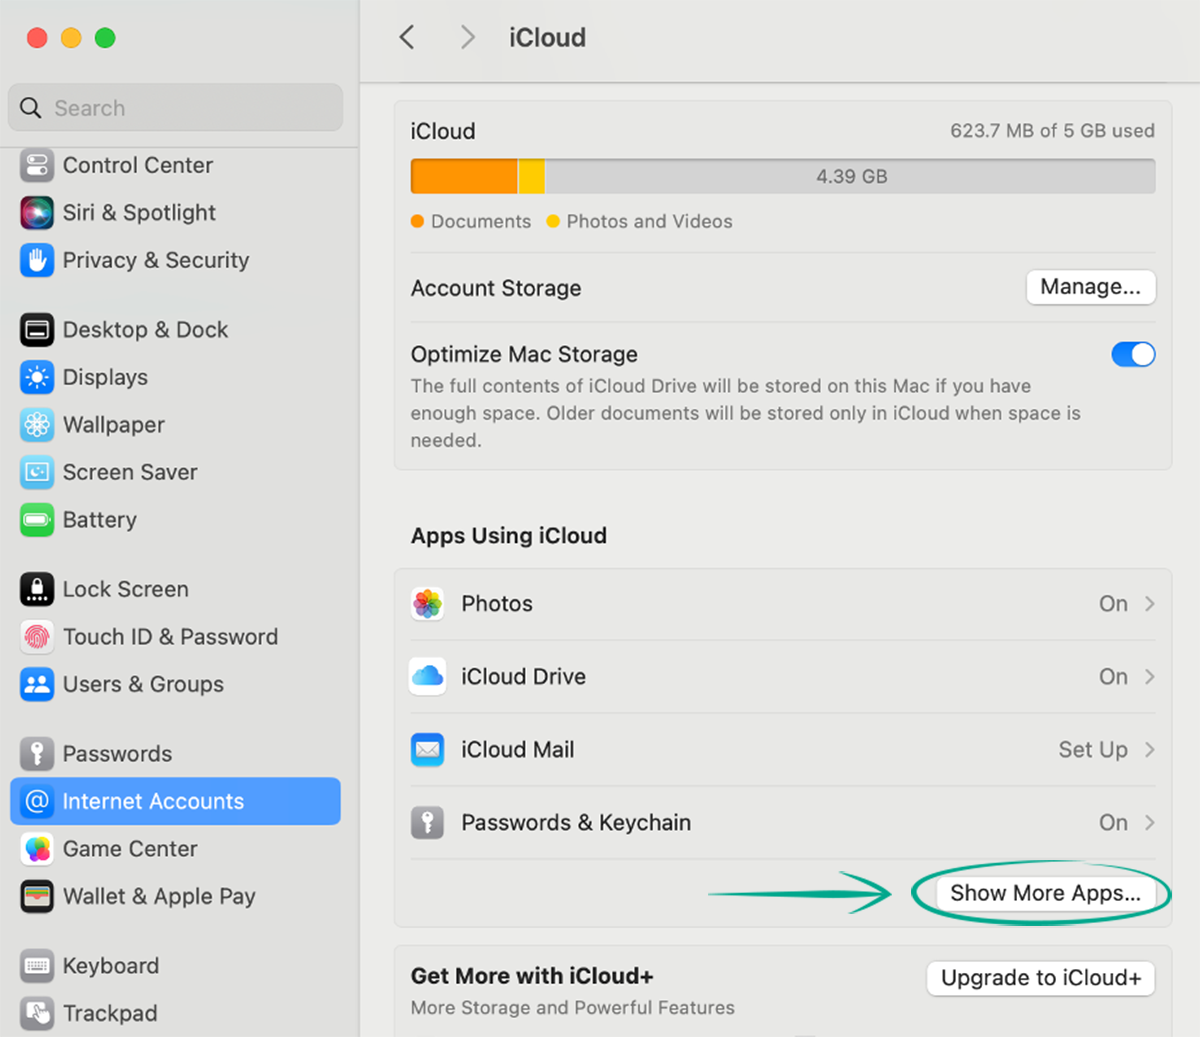
- Click Turn on;
- Make sure that the Find My Network function is enabled;
- Click Done.
If you don't want to rely on unfamiliar Apple gadgets, grant Find My Mac access to your location:
- Open the Apple menu by clicking the Apple emblem in the upper-left corner of the screen;
- In the drop-down list, select System Preferences;
- Go to the Privacy & Security section;
- If you previously enabled password protection for system-wide settings, the system will offer to unlock the settings. Enter your passcode or use your Touch ID to continue. Under Privacy, select Location Services;
- Turn on Location Services;
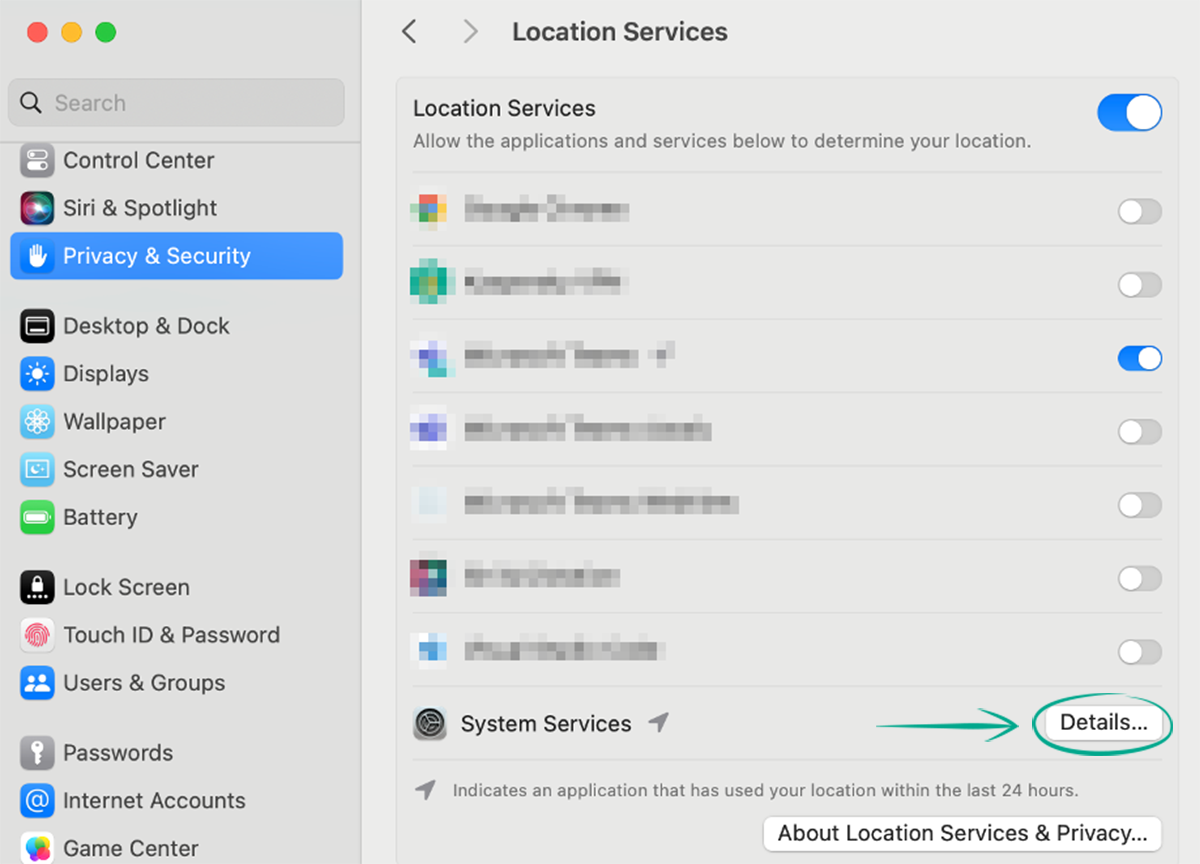
- Click Details... next to System Services;
- Turn on Find My Mac;
- Click Done.
What for: To prevent your computer from being infected by a virus disguised as a normal program.
Hackers frequently embed malicious code into well-known applications and distribute them disguised as safe software. To protect users from this type of attack, only apps from the Mac App Store or from trusted developers can be installed on Mac computers. You can choose which software sources should be considered safe:
- Open the Apple menu by clicking the Apple emblem in the upper-left corner of the screen;
- In the drop-down list, select System Preferences;
- Go to the Privacy & Security section;
- If you previously enabled password protection for system-wide settings, the system will offer to unlock the settings. Enter your passcode or use your Touch ID to continue. Under Security, select sources that you allow the system to download and install software from:
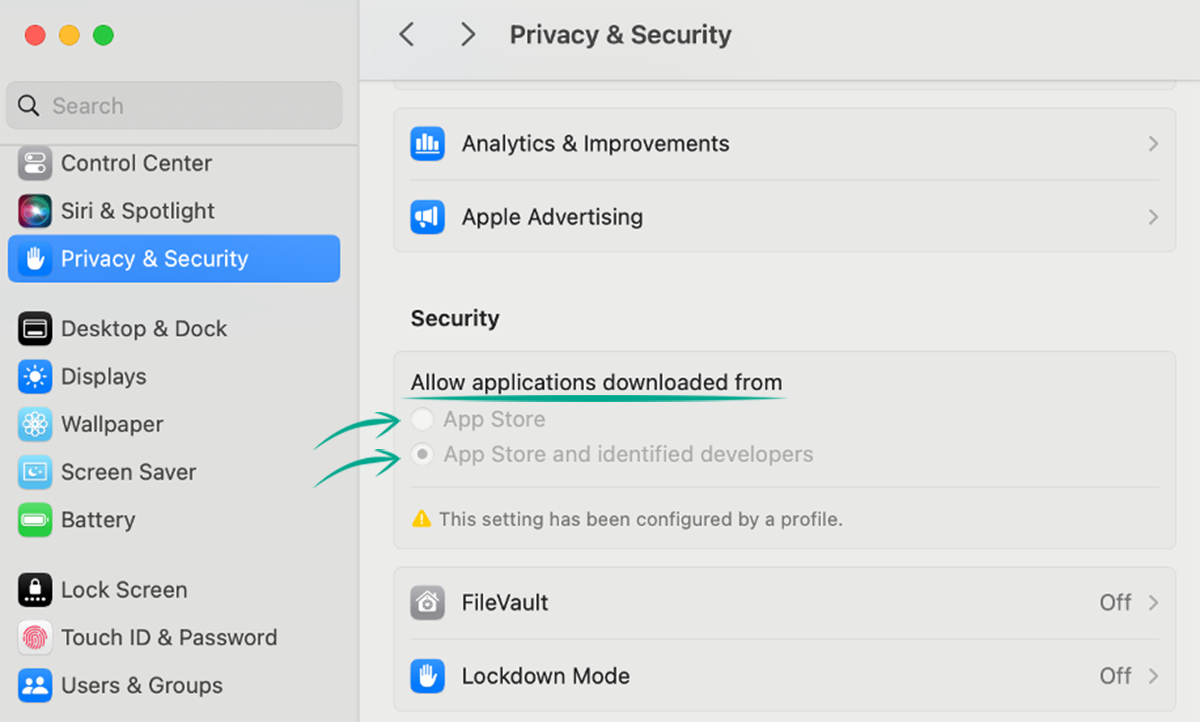
- App Store is the most strict setting. In this case, you can install applications only from Mac App Store;
- App Store and identified developers is a less strict setting. It lets you install applications from Mac App Store and applications from developers that have been verified by Apple.
While application source control is a crucial security measure, you may choose to download software from untrusted sources if you are absolutely certain of its safety. If you attempt to run an untrusted application, you will be prompted with a warning about potential risks and asked to confirm your action. Note that confirming does not add the source to the trusted list.
How to protect your Apple ID
What for: To prevent your data and devices from being hacked.
An Apple ID account lets you synchronize music, photos, contacts, and other data on different devices. If your account is hacked, criminals will gain access to all of that data. Once they have access to your Apple ID, they can also remotely lock your device or format your hard drive.
Make sure that your account is protected by a strong password that complies with the following requirements:
- Is at least 8 characters long;
- Contains lowercase and uppercase letters, numbers, and special characters ($, @, etc.);
- Is not an actual word or easy-to-guess phrase;
- Is not the same as your passwords for any other accounts;
- Does not consist of information that strangers could easily find out (your name, date of birth, pet's name, and so forth — or those of your friends or relatives).
To change your Apple ID password on a Mac computer:
- Open the Apple menu by clicking the Apple emblem in the upper-left corner of the screen;
- In the drop-down list, select System Preferences;
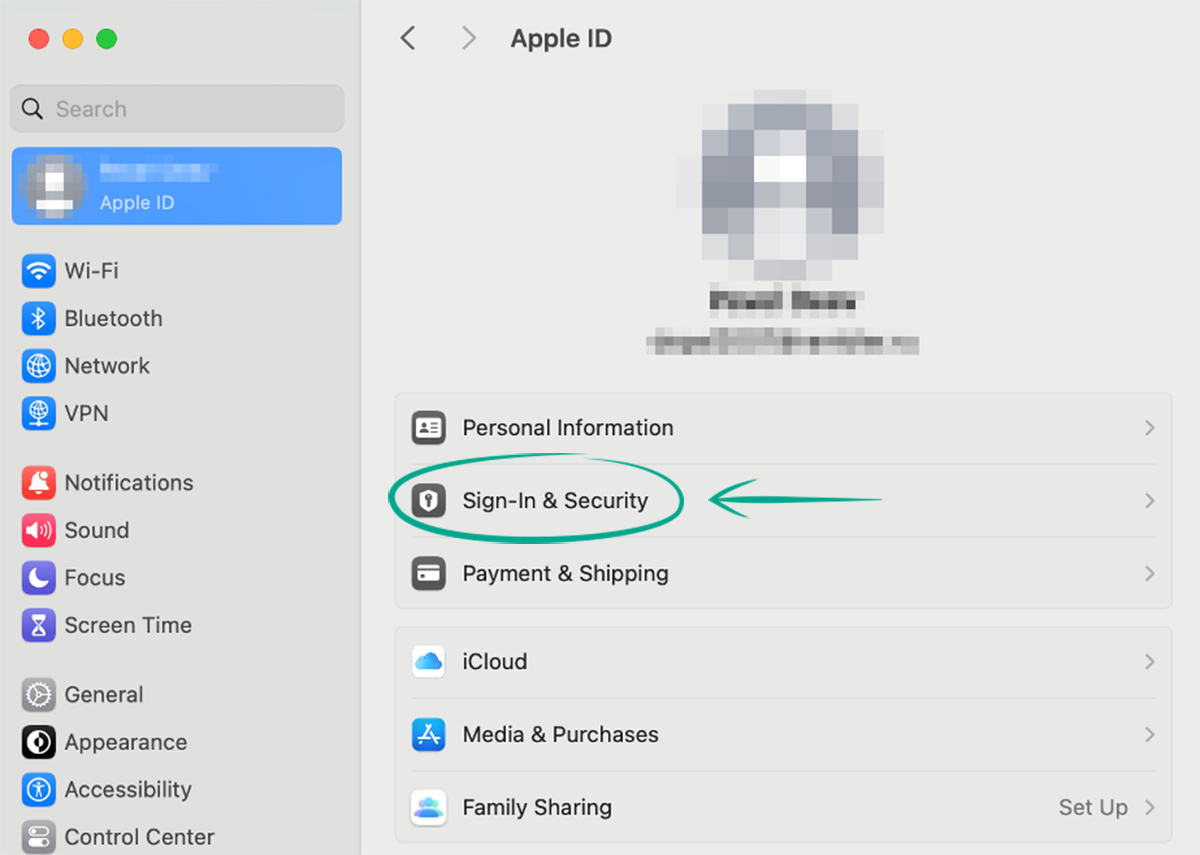
- Click the user name in the upper left corner of the window;
- Go to Sign in & Security;
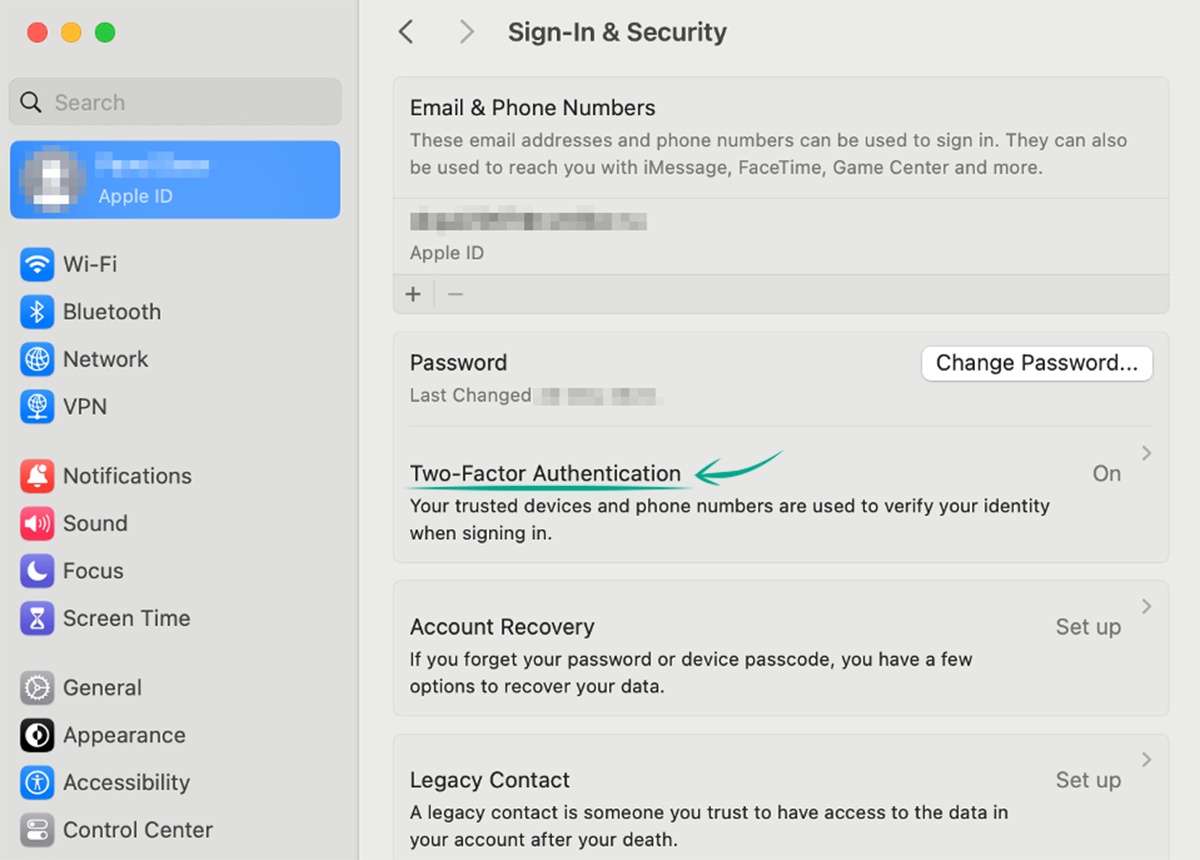
- Click Change Password...;
- Enter the current password for the computer account;
- Enter a new password and confirm it;
- Click Change.
You can also change or reset your Apple ID password on the Apple website.
What for: So you definitely don't get hacked.
Two-factor authentication helps provide additional security for your Apple ID. If you enable it, the system will prompt you for a one-time code each time you attempt to sign in from a new device. Every gadget where you are authenticated will get a notification as well.
- Open the Apple menu by clicking the Apple emblem in the upper-left corner of the screen;
- In the drop-down list, select System Preferences;
- Click the user name in the upper left corner of the window;
- Select Sign-In & Security;
- Select Two-Factor Authentication;
- Click Continue;
- Enter your phone number;
- Select a one-time code retrieval method: Text message or Phone call;
- Click Continue;
- Enter the password for the computer account;
- Enter the verification code you have received on your phone and click Next;
- Click Done.
What for: To not risk compromising your Apple ID password in third-party applications.
You can grant third-party services access to information stored in iCloud. This is convenient if you need to synchronize data on devices from different vendors. For example, you can do this to receive notifications about events not only through iCloud but also through applications in Windows and Android.
However, the more frequently you enter your Apple ID password in various services on different devices, the higher the risk that your password will be compromised. For this reason, Apple prompts you to define your own password for each third-party app.
Please keep in mind that app-specific passwords are unavailable if two-factor authentication is disabled in your Apple ID. To find out how to enable it, click here.
To create a password for an application:
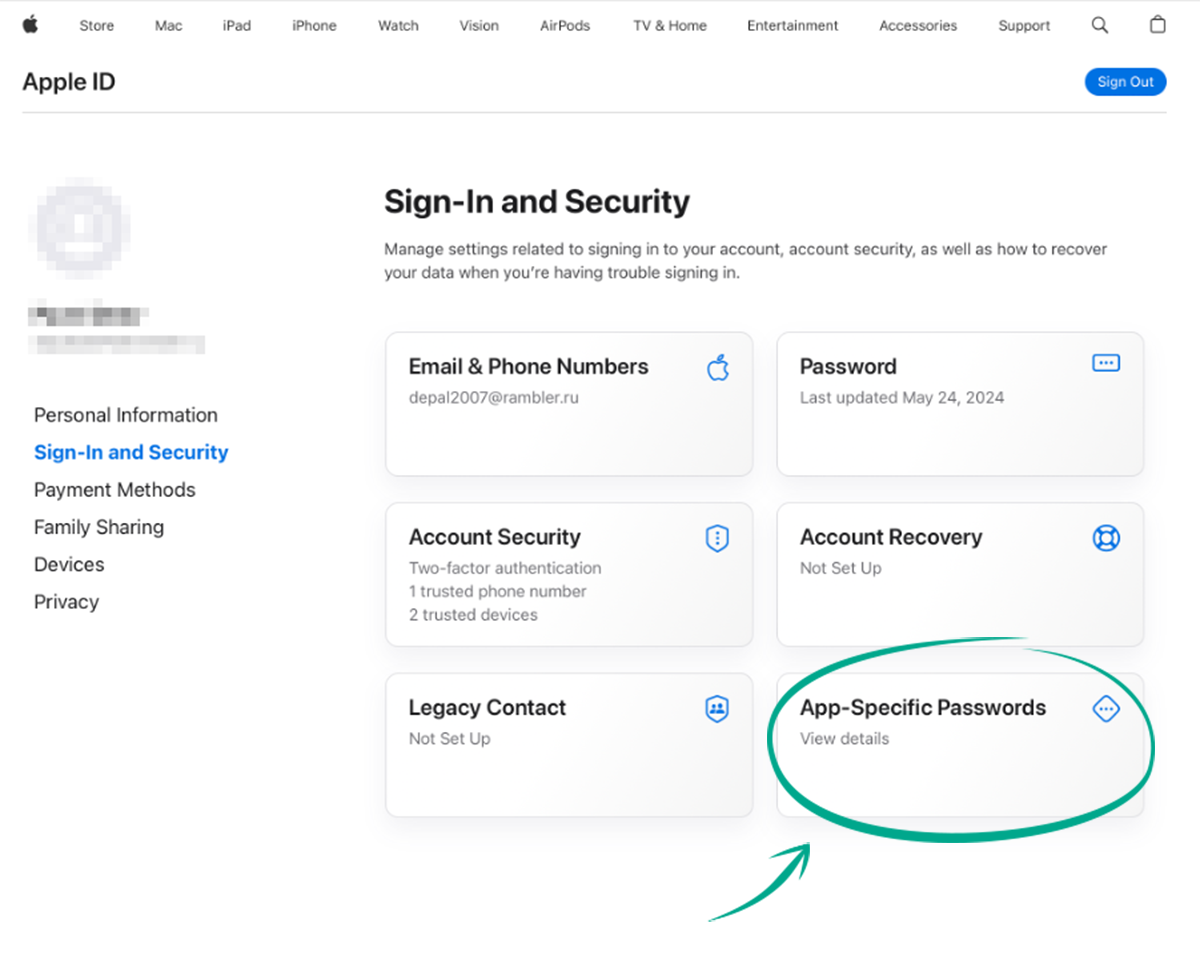
- Open your browser and sign in to https://appleid.apple.com/sign-in;
- Enter your Apple ID and password to sign in to your account;
- Go to the App-Specific Passwords section;
- Click Generate App-Specific Password;
- Name your new password to avoid confusing it with others;
- Click Create;
- The system will generate a password. Write it down and use it to sign in to the third-party service. The password will be linked to the application when entered for the first time;
- Click Done.
Please keep in mind that you cannot use more than 25 passwords at the same time.
Do not store your passwords for applications in a file on your computer or on a sheet of paper next to it. Use a password manager instead, such as iCloud Passwords & Keychain or Kaspersky Password Manager.
If you decide to stop using a specific service, delete its password:
- Open your browser and go to the website;
- Enter your Apple ID and password to sign in to your account;
- Go to App-Specific Passwords;
- Click the minus icon next to the password that you no longer need; To delete all passwords, click Revoke all;

- Click Revoke.
After doing so, you will not be able to sign in to a service with your Apple ID until you create a new password for this service.
Please note: If you change or reset your Apple ID password, all app-specific passwords are revoked.
How to protect your data
What for: To keep your data private.
There is a built-in file encryption system in macOS called FileVault. If you turn it on, access to your data cannot be obtained without your password, even if someone puts your hard drive into another computer. To turn on FileVault:
- Open the Apple menu by clicking the Apple emblem in the upper-left corner of the screen;
- In the drop-down list, select System Preferences;
- Go to the Privacy & Security section;
- If you previously enabled password protection for system-wide settings, the system will offer to unlock the settings. Enter your passcode or use your Touch ID to continue. Under Security, select FileVault;
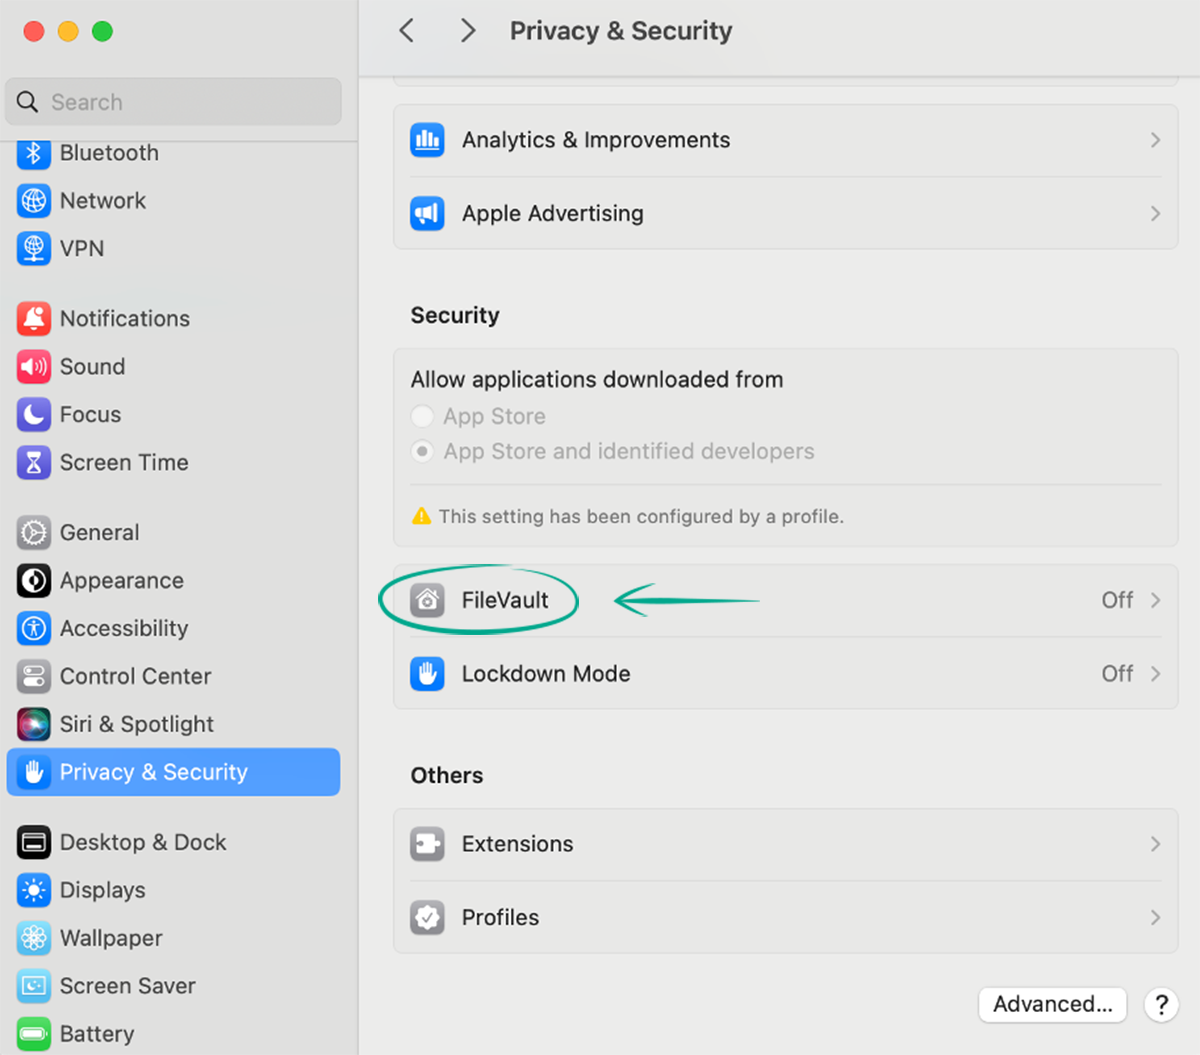
- Click Turn On...;
- Select how you would like to reset the password in case you forget it:
- Allow my iCloud account to unlock my disk. This is a more convenient option if you're using an iCloud account. It doesn't require you to memorize any extra keys.
- Click Continue.
- Create a recovery key and do not use my iCloud account. Use this option if you would rather not link the computer to an iCloud account. Don't lose the key, or else the data will be lost permanently.
- Copy or write down the recovery key and store it in a secure location;
- Click Continue.
If you want to use iCloud to restore access, ensure that your Apple ID is secured. If your account is hacked, a criminal will be able to reset your FileVault password and sign in to the system. If you are using a recovery key, write it down and store it in a safe place. Without the key, it will be impossible to restore access to your files.
Encryption of the boot drive will begin the first time the computer is started after FileVault is turned on. It will start automatically in the background when your Mac is connected to the network.
Downside: After turning on FileVault, your computer may run slower, you will not be able to automatically log in to the system, and you will have to enter the password each time the computer is started.
What for: To not lose your data.
Your Mac can automatically back up all important information to iCloud servers or a physical drive. A backup copy will help restore your data if your computer is lost or broken. These backup copies will also save your passwords, preferences, documents, and photos.
To create an iCloud backup copy:
- Open the Apple menu by clicking the Apple emblem in the upper-left corner of the screen;
- In the drop-down list, select System Preferences;
- Click the user name in the upper left corner of the screen;
- Click iCloud;
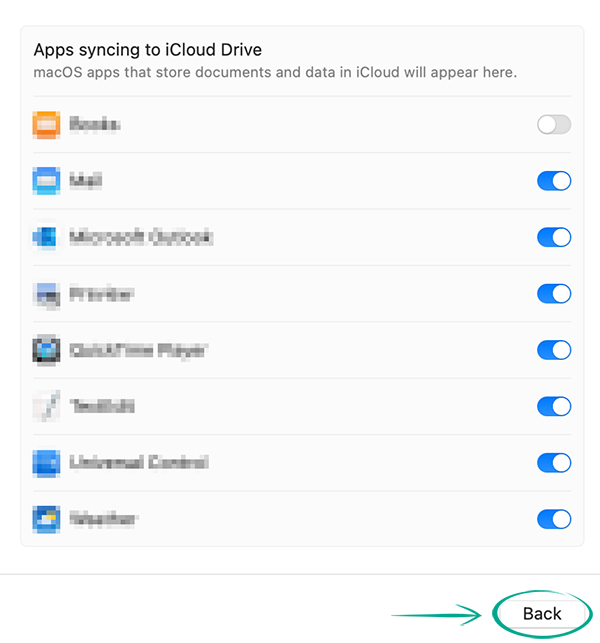
- Under Apps Using iCloud, select iCloud Drive;
- Click Apps syncing to iCloud Drive and turn on the toggle switches next to the apps whose data you want to store in iCloud;
- Click Back;
- Click Done.
Please keep in mind Data is only backed up when you're connected to the Internet. In addition, you cannot save more than 5GB of data in iCloud with a free account.
Downside: Saving data in the cloud increases the risk of data leaks.
You can create a backup copy on a physical drive, such as an external hard drive. To do so, use the built-in automatic backup tool called Time Machine. In this case, your data is not transmitted over the network, and the size and number of copies is limited only by the capacity of the drive.
To turn on Time Machine:
- Connect the backup drive to your Mac. For a list of devices that are compatible with Time Machine, visit https://support.apple.com/en-us/HT202784;
- Open the Apple menu by clicking the Apple emblem in the upper-left corner of the screen;
- In the drop-down list, select System Preferences;
- Go to the General section;
- Select Time Machine;

- If you previously enabled password protection for system-wide settings, the system will offer to unlock the settings. Enter your passcode or use your Touch ID to continue. Click Add Backup Disk...;
- Click the disk name;
- Click Set Up Disk...;
- Turn on Encrypt Backup;
- Enter a password twice and think of a password hint;
- Click Done.
Time Machine will now create a backup and keep updating it every hour as long as the disk is connected to the computer. It will also separately store daily copies for the past month and weekly copies for the entire previous operating period. When the drive runs out of free space, Time Machine will start replacing the oldest entries with the newest ones.
Downside: You have to connect an external drive to the computer. The first data backup may take a long time.
What for: To keep your account credentials and payment information safe.
The built-in iCloud Keychain app lets you store and automatically insert account credentials, Wi-Fi network passwords, and payment card details. Because of synchronization, this data is available on Mac, iPhone and iPad. Although this service is considered to be sufficiently secure, there is always a risk that any electronic data can be leaked.
To erase this data:
- Open the Apple menu by clicking the Apple emblem in the upper-left corner of the screen;
- In the drop-down list, select System Preferences;
- Click the user name in the upper left corner of the screen;
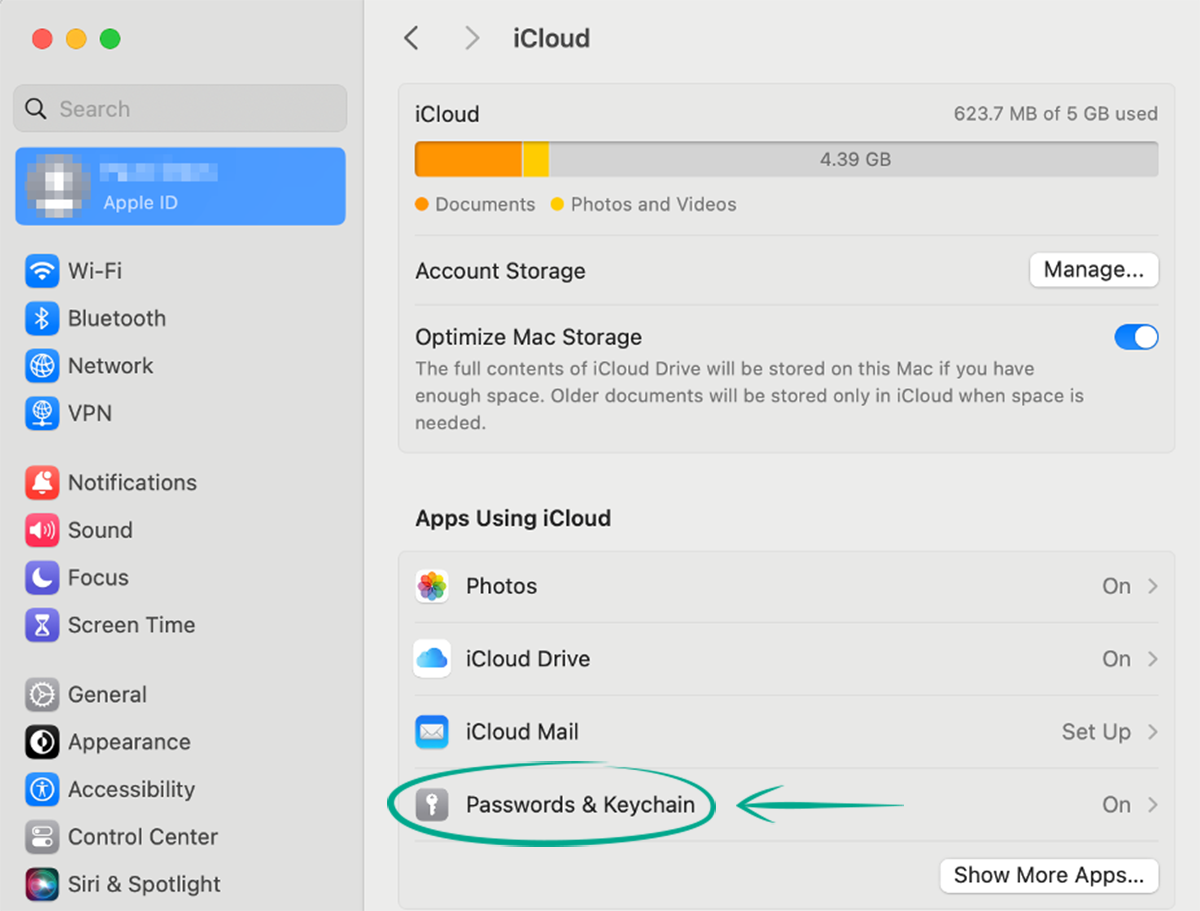
- Click iCloud;
- Select Passwords & Keychain;
- In the window that appears, turn off Sync this Mac to keep your data stored locally and not synchronized with any other devices;
- Click Done.
Please note that passwords and credit card details that are deleted from Keychain on a Mac may remain in other storage, such as the Safari autofill list.
How to protect yourself from snooping
What for: To prevent applications from spying on you.
The system and certain applications can obtain access to your computer's camera and microphone, for example during a video call. Malicious applications may also try to exploit this access to spy on you. Check the list of applications that have access to the microphone and camera, and revoke that access from applications that you don't use:
- Open the Apple menu by clicking the Apple emblem in the upper-left corner of the screen;
- In the drop-down list, select System Preferences;
- Go to the Privacy & Security section;
- If you previously enabled password protection for system-wide settings, the system will offer to unlock the settings. Enter your passcode or use your Touch ID to continue. Under Privacy, select Microphone and Camera;
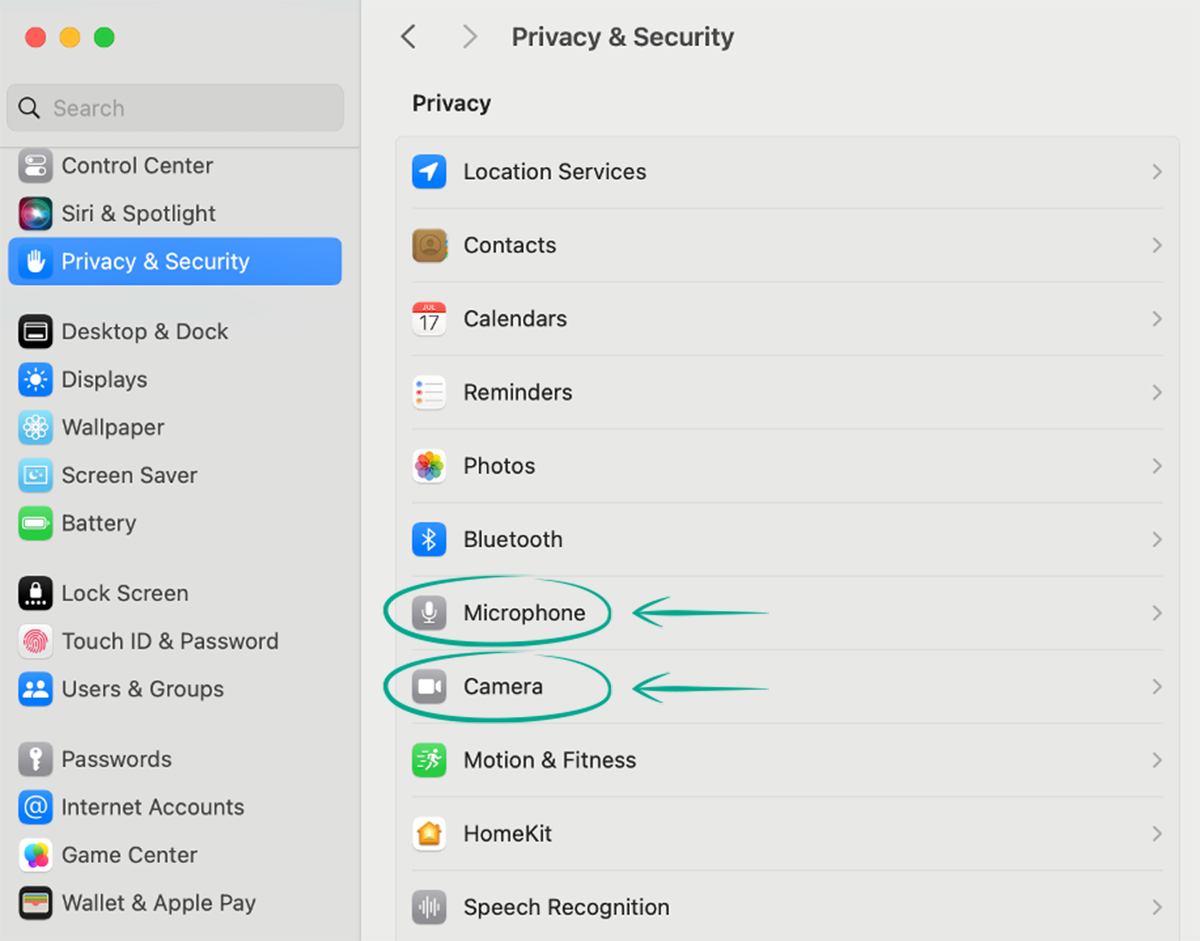
- Turn off the toggle switches next to apps you want to deny access to.
You can restore access in the same menu.
Downside: Applications that you block from using the camera and microphone will not be able to take photos, record videos, or execute voice commands.
What for: To prevent hackers from taking control of your system.
Universal access allows applications to directly interact with the interface and the system. For example, if you want to use a voice assistant or a screen reader app, they must have the ability to see the contents of windows and to click buttons. However, malicious applications may also try to obtain universal access. For example, they may try to follow ad links or phishing links on your behalf.
Check which services have this access, and close it for suspicious applications:
- Open the Apple menu by clicking the Apple emblem in the upper-left corner of the screen;
- In the drop-down list, select System Preferences;
- Go to the Privacy & Security section;
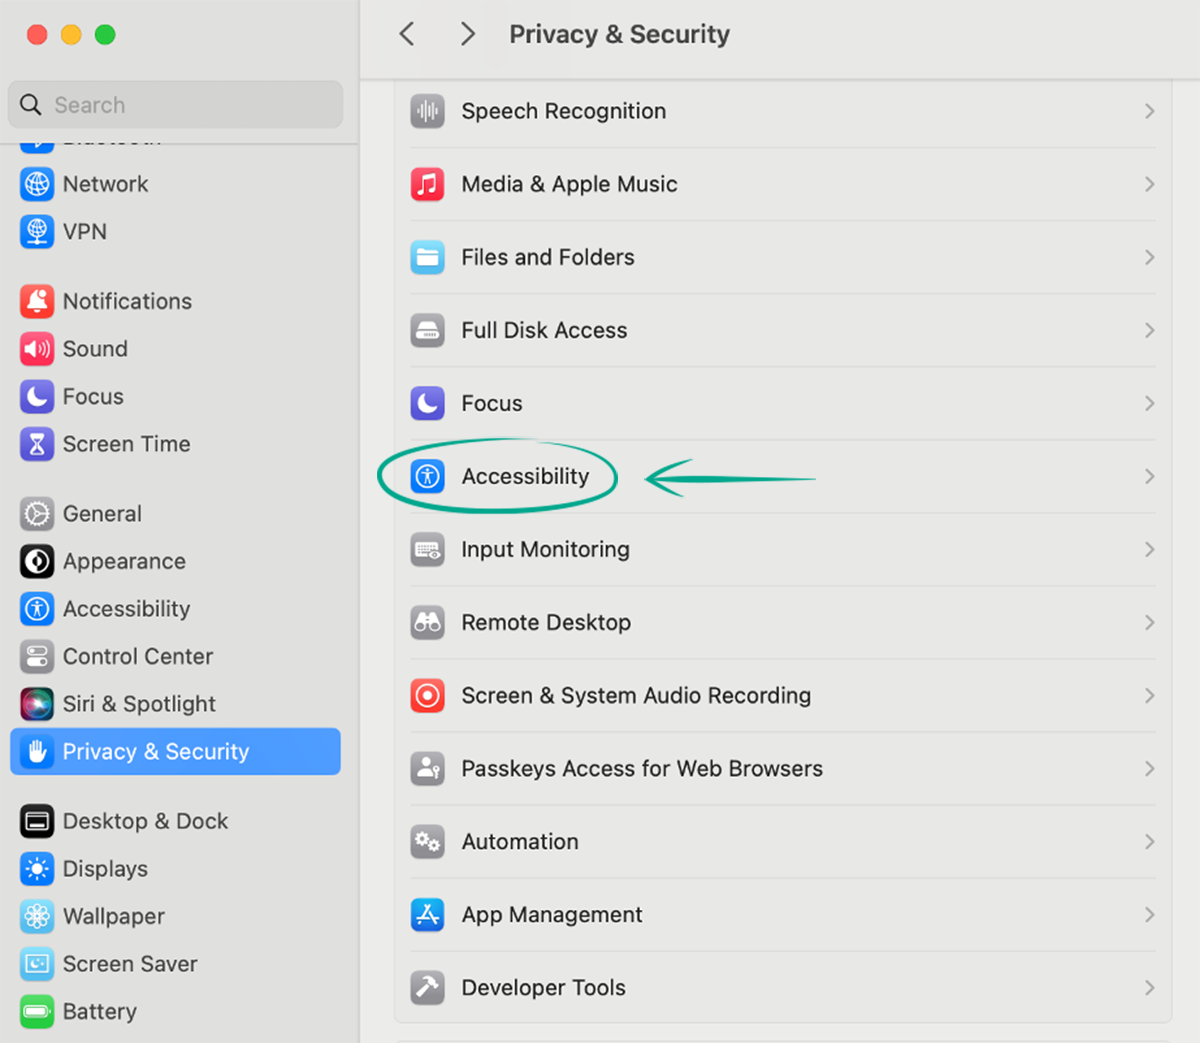
- Under Privacy, select Accessibility;
- If you previously enabled password protection for system-wide settings, the system will offer to unlock the settings. Enter your passcode or use your Touch ID to continue;
- Turn off the toggle switches next to the apps you want to keep from using the accessibility features.
What for: To prevent Apple and app developers from knowing more about you than necessary.
Applications and websites may have access to your contacts list, calendars, and reminders in iCloud. For example, if you allow a messenger to view your address book, you will be able to find acquaintances who also use the app. However, some applications may abuse their access and collect and sell databases of contacts, for example. You can check which services have access to your data and revoke it if necessary:
- Open the Apple menu by clicking the Apple emblem in the upper-left corner of the screen;
- In the drop-down list, select System Preferences;
- Go to the Privacy & Security section; If you previously enabled password protection for system-wide settings, the system will offer to unlock the settings. Enter your passcode or use your Touch ID to continue;
- Under Privacy, select, one by one, Contacts, Calendars, and Reminders;
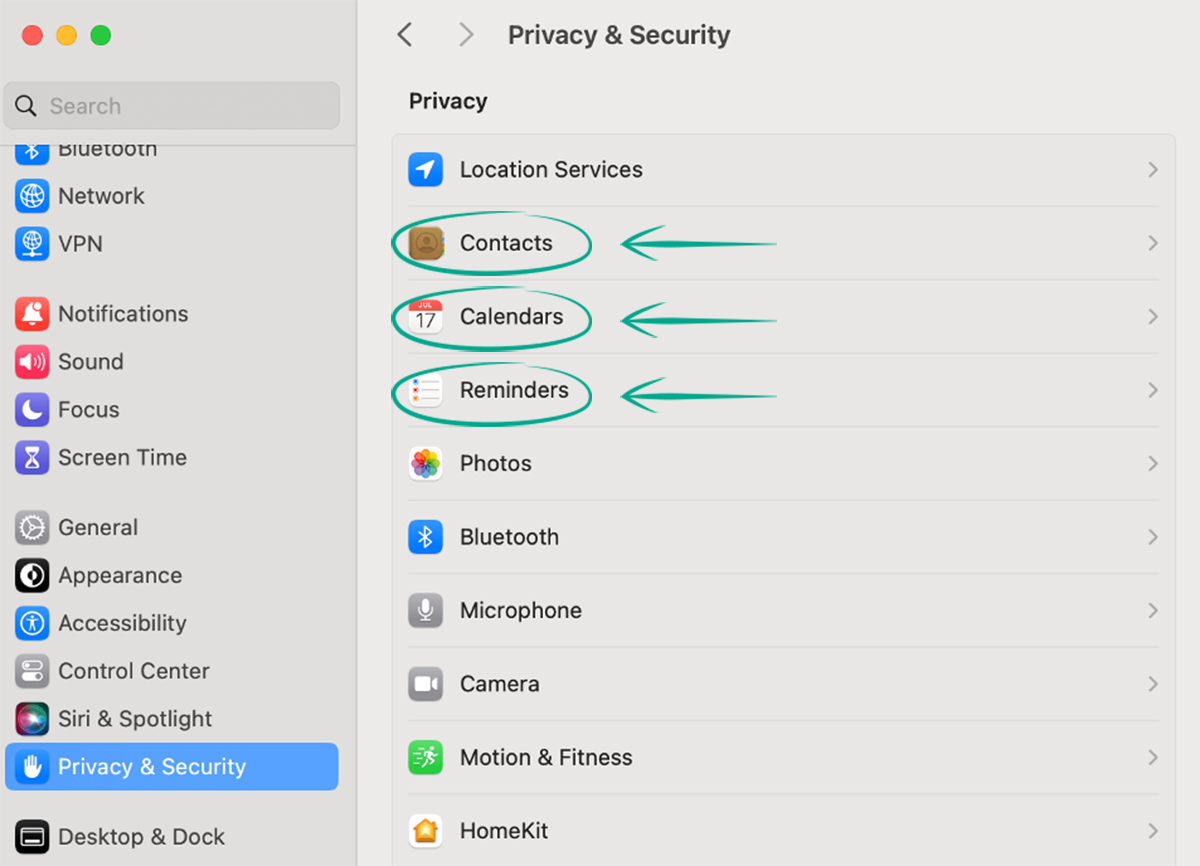
- Turn off the toggle switches next to apps you want to deny access to.
Downside: Some application functions will become unavailable, such as event scheduling and sending messages to your contact list.
What for: So macOS and apps do not know where you go.
Apple devices continually gather information about your location. Among other purposes, this information is used to choose contextual ads and for searches on your Mac. Because the data is stored on Apple servers and may be transmitted to third parties, there is a risk of data leaks. You can disable access to location for all services and apps, and enable it for individual applications when necessary.
To check which applications and services have access to your location, and to revoke unnecessary permissions:
- Open the Apple menu by clicking the Apple emblem in the upper-left corner of the screen;
- In the drop-down list, select System Preferences;
- Go to the Privacy & Security section;
- If you previously enabled password protection for system-wide settings, the system will offer to unlock the settings. Enter your passcode or use your Touch ID to continue;
- In Privacy & Security, click Location Services to view a list of applications that have access to device location data;
- Turn off the toggle switches next to the apps you want to keep from accessing your location;
- Find System Services at the end of the list and click Details...;
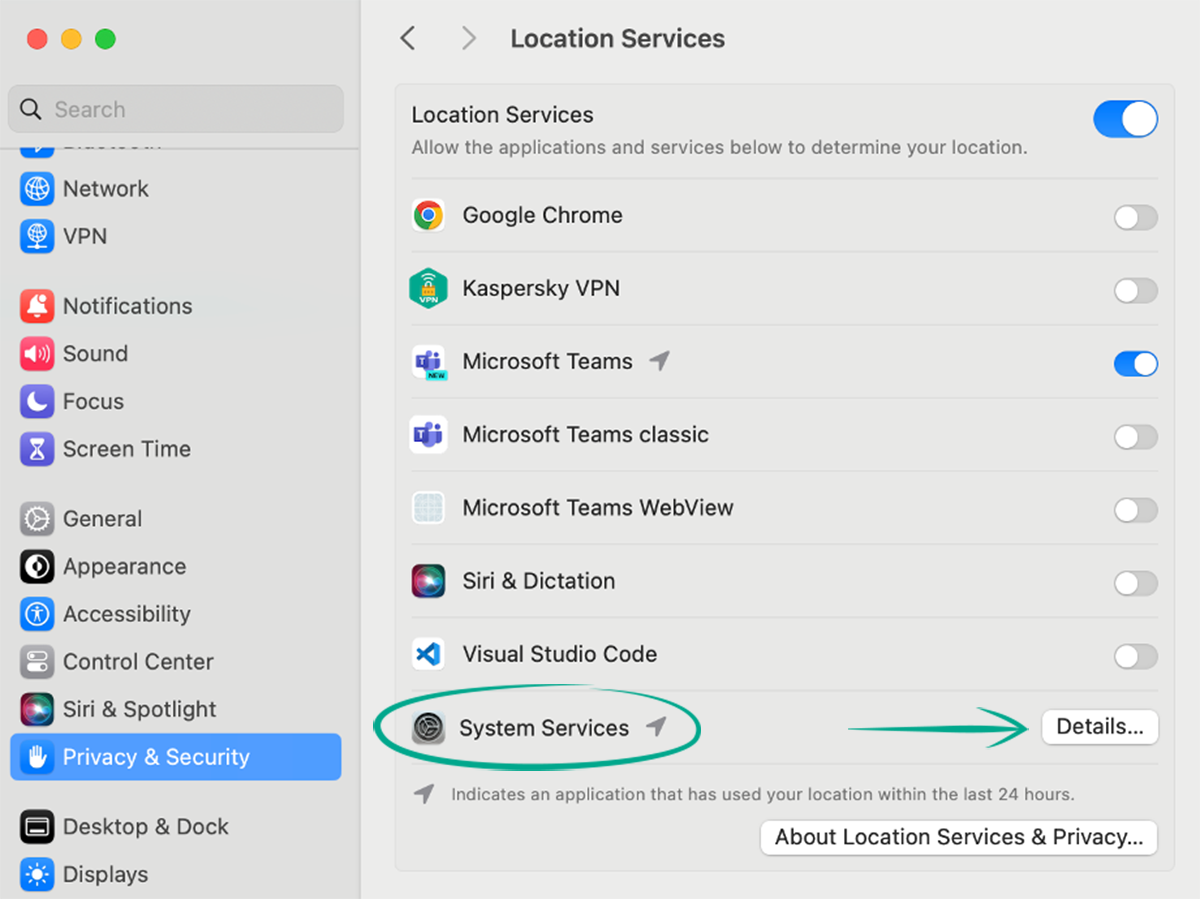
- Turn off the options you don't need. It is advisable to retain device location access for at least the Find My Mac feature because it will increase your chances of finding your device in case it is lost or stolen;
- Click Done.
Downside: You will not be able to use location services, such as for nearby searches.
What for: To prevent Apple from receiving recordings of your voice.
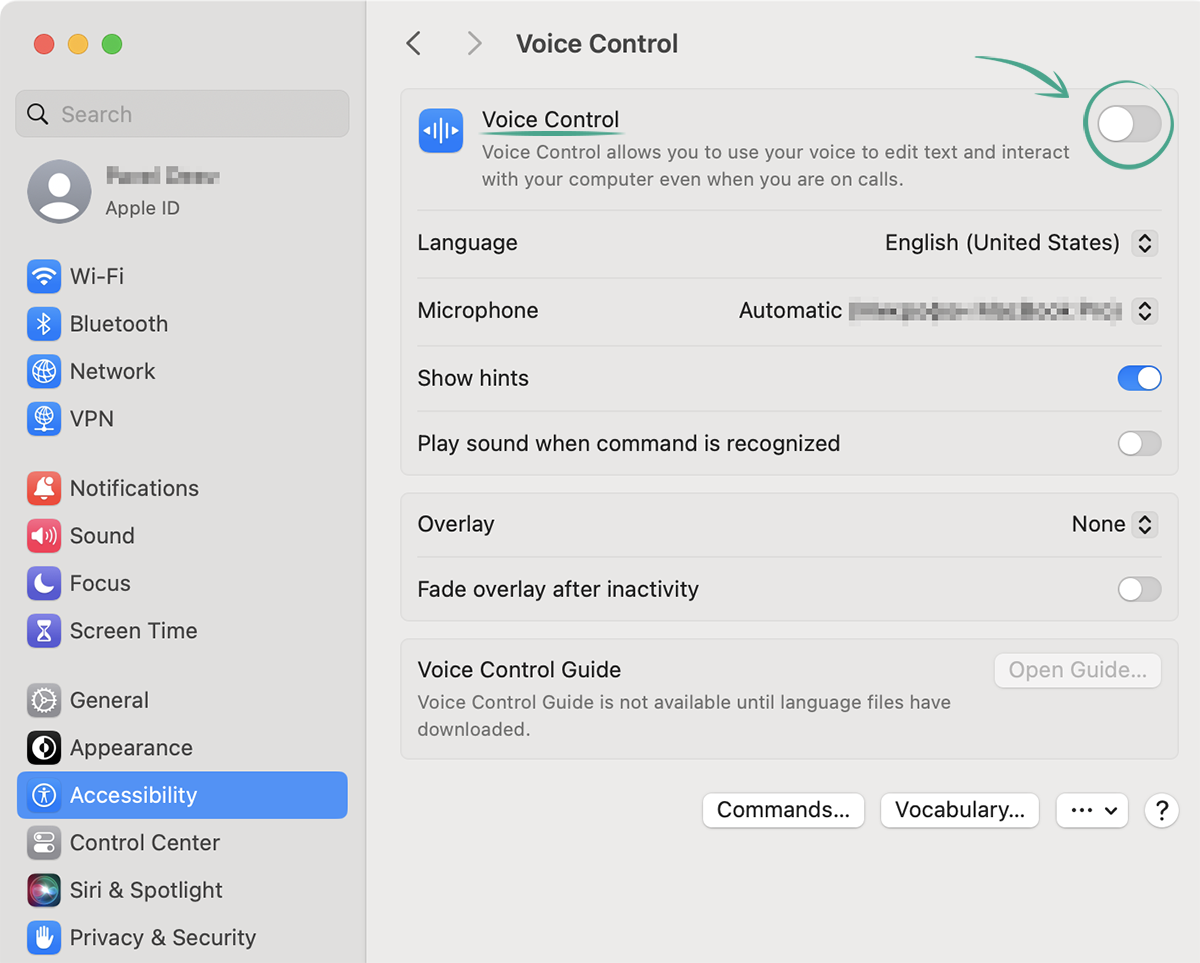
You can use voice commands to manage your computer. Although this may be convenient, macOS will periodically send samples of your voice to Apple after you turn on this function. The data is sent in an encrypted form and helps Apple improve its voice control features. If you don't want your voice samples to be sent to the company's servers, you can disable voice control.
- Open the Apple menu by clicking the Apple emblem in the upper-left corner of the screen;
- In the drop-down list, select System Preferences;
- Go to the Accessibility section;
- Select Voice Control;
- Turn off Voice Control;
When you use the Siri voice assistant, everything you say is recorded and then sent to Apple for analysis, to help Siri improve future speech recognition. You can turn off the Voice Assistant and Dictation so that this data is not sent to Apple servers:
- Open the Apple menu by clicking the Apple emblem in the upper-left corner of the screen;
- In the drop-down list, select System Preferences;
- Select Siri & Spotlight;
- Turn off Ask Siri;
- Go to Keyboard and turn off Dictation.

Downside: You will not be able to use voice commands, Siri Virtual Assistant, or text dictation.
What for: To not share your information with Apple and app developers.
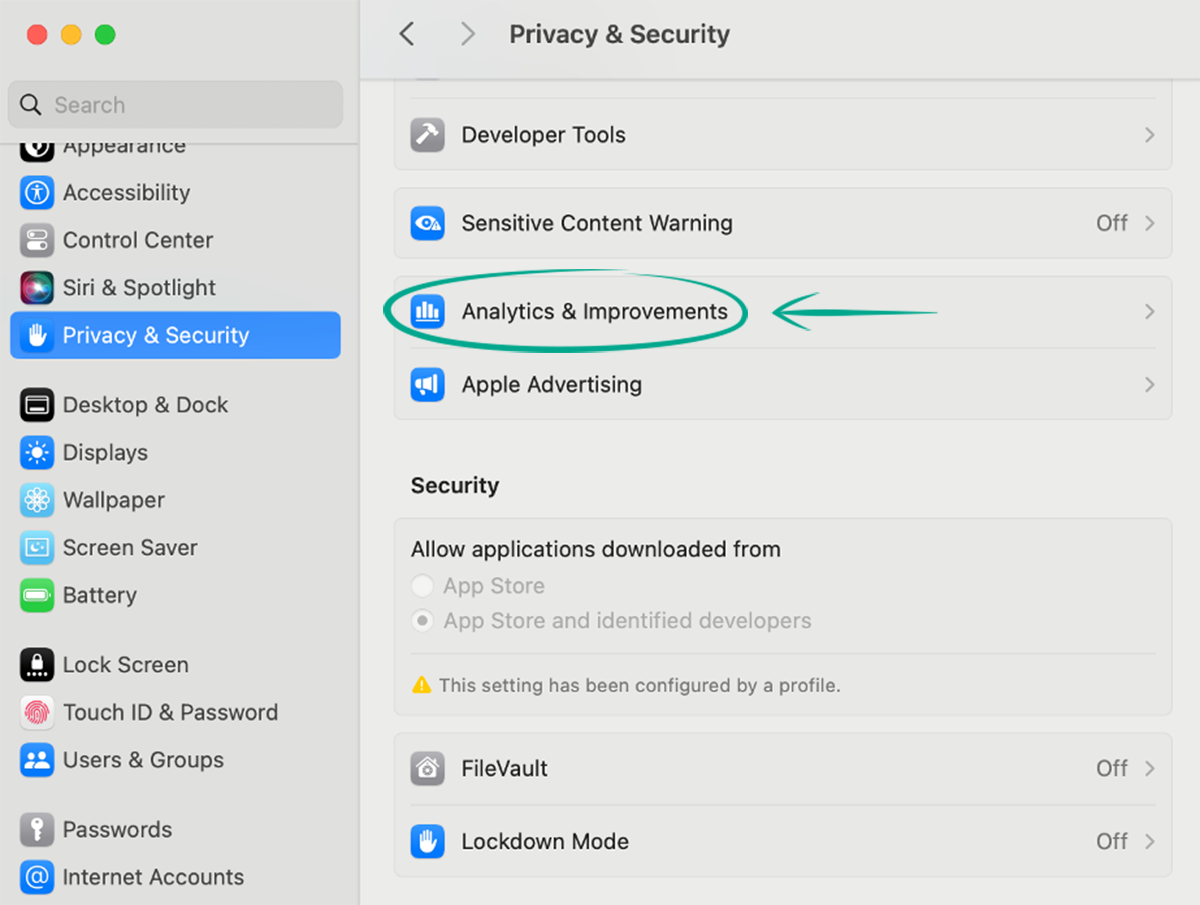
When an error occurs, your computer automatically sends Apple and app developers information about Mac usage and the devices connected to it. In addition to technical data, the system may also transmit private data that is depersonalized before processing. Although Apple asserts that statistics collection poses no threat to the security of your private data, you can disable the function:
- Open the Apple menu by clicking the Apple emblem in the upper-left corner of the screen;
- In the drop-down list, select System Preferences;
- Go to the Privacy & Security section;
- Under Privacy, select Analytics & Improvements;
- If you previously enabled password protection for system-wide settings, the system will offer to unlock the settings. Enter your passcode or use your Touch ID to continue;
- Turn off Improve Siri & Dictation, Share with app developers, and Share Mac Analytics.