


How to keep your account from getting hacked
What for: So you don't get hacked.
If you use a short and simple password, cybercriminals can guess it and hijack your account. A long and complex password is more secure. Use a strong password that:
- Is at least 8 and up to 20 characters long;
- Contains lowercase and uppercase letters, numbers, and special characters ($, @, etc.);
- Is not an actual word or easy-to-guess phrase;
- Is not the same as your passwords for any other accounts;
- Does not consist of information that strangers could easily find out (your name, date of birth, pet's name, and so forth — or those of your friends or relatives).
To change your password:
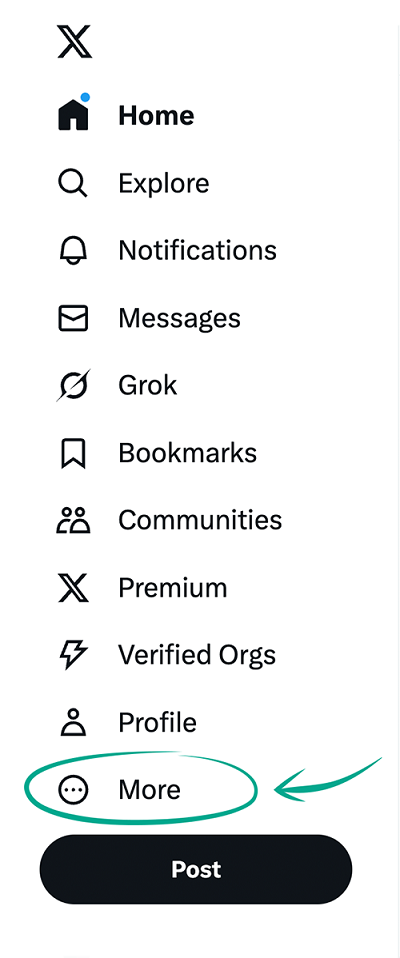
- Click More in the menu on the left to view advanced settings;
- Open Settings and privacy;
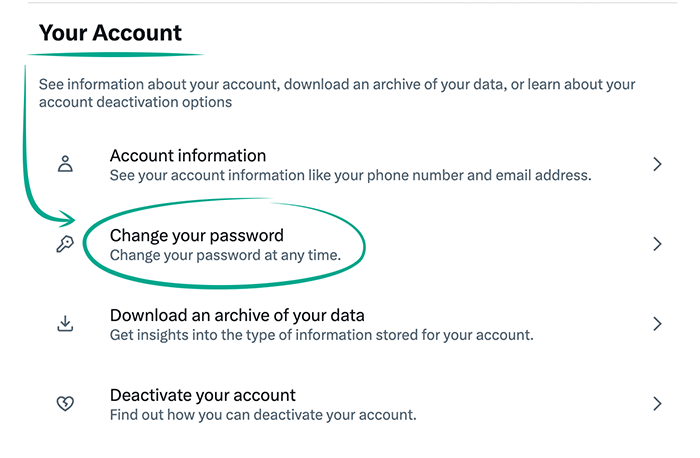
- In the Your account section, select Change your password;
- Enter the current password for your X(Twitter) account;
- Enter a new strong password twice;
- Click Save.
What for: So you definitely don't get hacked.
X(Twitter) can prompt you to enter an additional one-time code every time you log in to your account. If cybercriminals attempt to hack your account, they will not be able to log in without this code. The code can be received in different ways: via a text message (SMS) or using an authentication app or device.
To enable two-factor authentication:
- Click More in the menu on the left to view advanced settings;
- Open Settings and privacy;
- Go to the Security and account access section;
- Select Security;
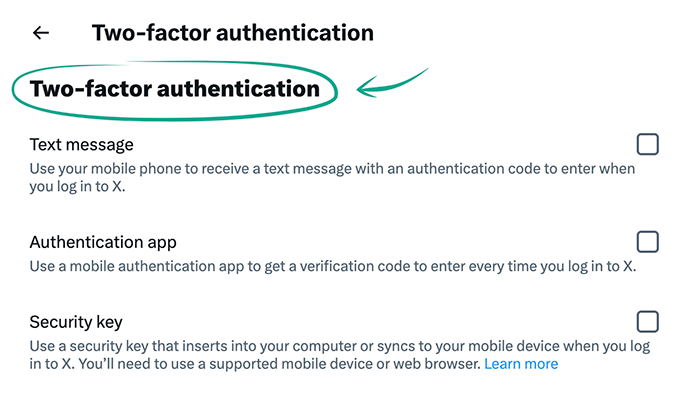
- Select Two-factor authentication;
- Choose a verification method and follow the on-screen directions:
- Text message — receive a one-time code via SMS. This option is available to Premium subscribers only;
- Authentication app — a one-time code is generated in a dedicated app such as Kaspersky Password Manager (subscription required), Authy, or Google Authenticator;
-
Security key — a one-time code is generated using a USB, Bluetooth or NFC authorization device;
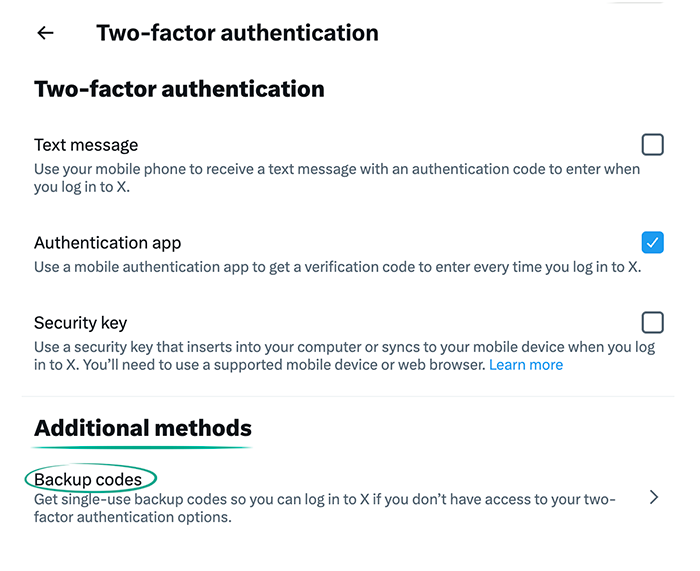
- When two-factor authentication is enabled, you will see a dialog box with a one-time backup code. Copy it and store it in a safe place. You need this code to access your account if you lose your phone;
- You can get the code later by selecting Backup codes in the Additional methods section.
Downside: If you use SMS-based authentication, X(Twitter) can use the specified phone number for targeted ads.
What for: To maximize account security against hacking.
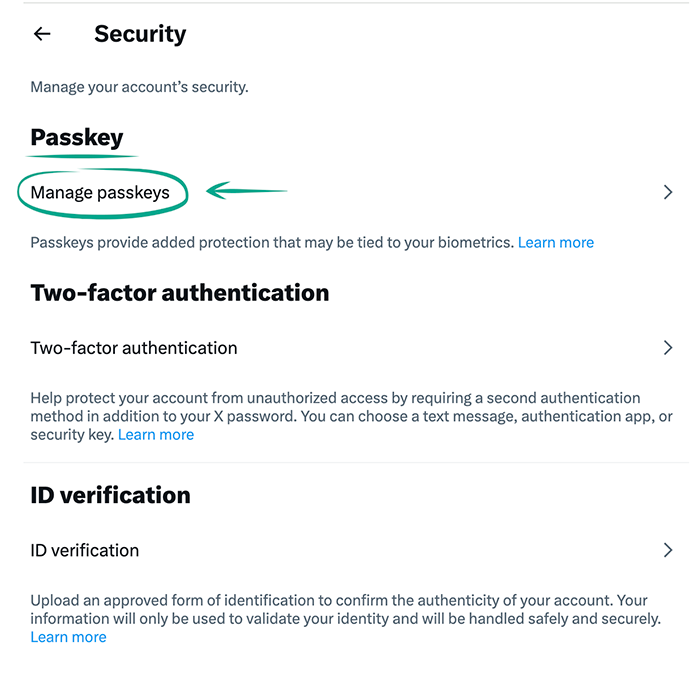
X(Twitter) supports both password-based and passwordless (passkey) authentication. Selecting this authentication method means you'll be using the built-in unlock options available on your device, such as fingerprint scanning. Biometric authentication methods simplify and speed up the sign-in process. Additionally, if you're not typing in your password manually, attackers cannot see or intercept it.
To enable passwordless authentication:
- Click More in the menu on the left to view advanced settings;
- Open Settings and privacy;
- Go to the Security and account access section;
- Select Security;
- Under Passkey, click Manage passkeys;
- Click Create a new passkey;
- Enter your current account password and click Confirm;
- Click Create passkey, then Done.
Downside: If you lose or change your device, you won't be able to sign in with a passkey, and you'll have to use your login and password instead. You will still need the password to sign in on devices where you don't have a passkey, use certain settings, or authorize certain actions.
What for: So no one can change your password without your knowledge.
For added anti-hacking protection, enable extra identity verification when changing your password. If anyone tries to reset your password, X(Twitter) will ask to verify the e-mail address and phone number linked to your account.
To activate the protection:
- Click More in the menu on the left to view advanced settings;
- Open Settings and privacy;
- Go to the Security and account access section;
- Select Security;
- Turn on Password reset protection;
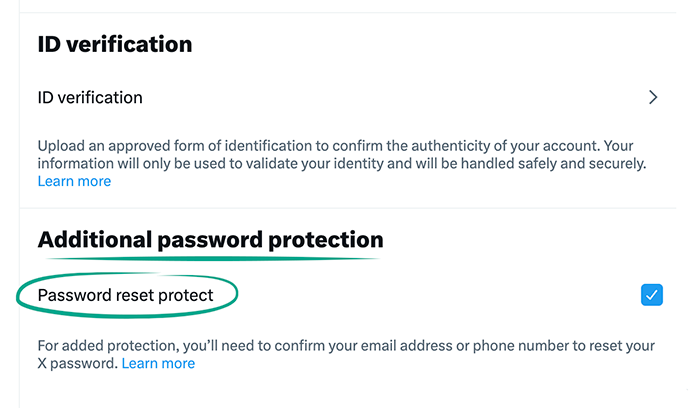
- Enter your password and click Save.
What for: To make sure that you are the only one who has access to the account.
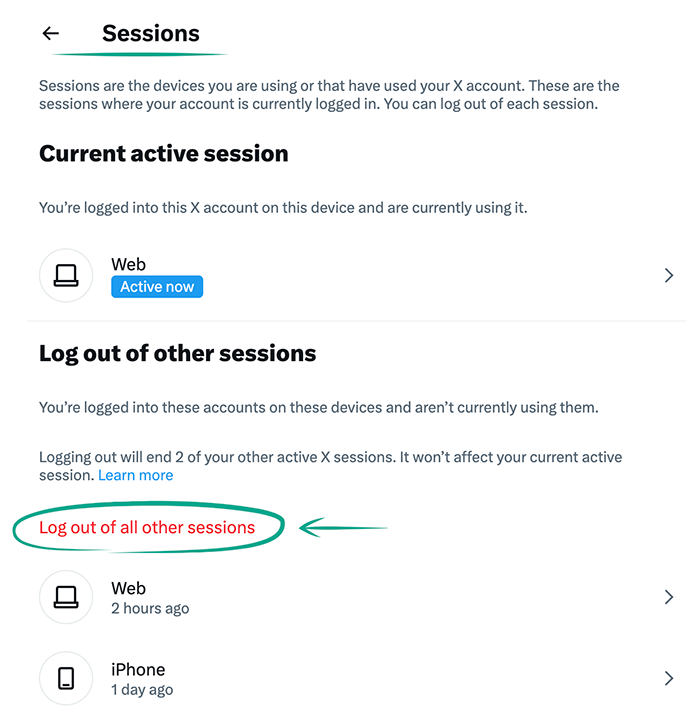
You can view the history of logins and other activities carried out on behalf of your account. If you detect any suspicious activity, immediately change your password and terminate all active sessions except the current one.
To check account security and terminate suspicious X(Twitter) sessions:
- Click More in the menu on the left to view advanced settings;
- Open Settings and privacy;
- Go to the Security and account access section;
- Click Apps and sessions;
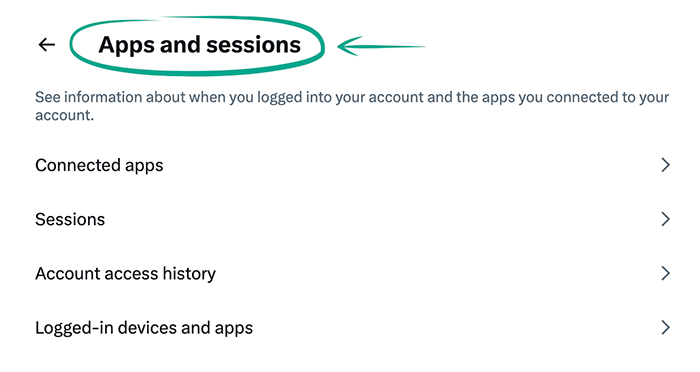
- Check your personal data and activity history in the Sessions and Account access history sections;
- Click Log out all other sessions to end all active X(Twitter) sessions except the current one.
What for: To avoid putting all your eggs in one basket.
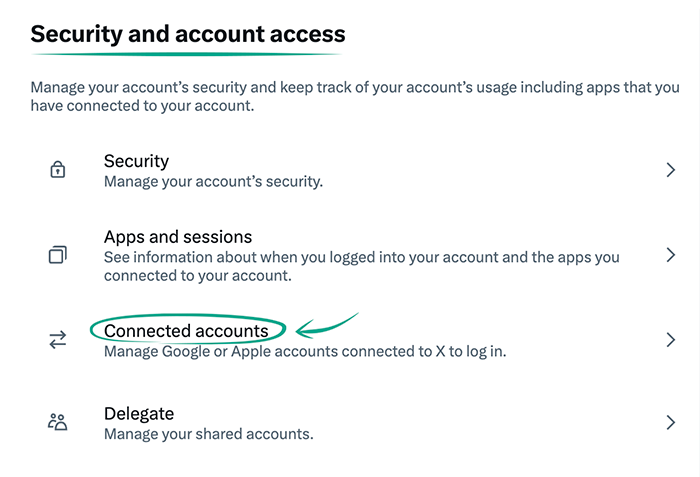
X(Twitter) can be connected with a Google or Apple account for faster sign-in. However, if an attacker hacks these accounts, they'll get access to your X(Twitter) account too.
To unlink a third-party account:
- Click More in the menu on the left to view advanced settings;
- Open Settings and privacy;
- Go to the Security and account access section;
- Select Connected accounts;
- Click Disconnect;
- Type in your password and click Disconnect.
Please note: If you disconnect a third-party account, you won't be able to sign in to X(Twitter) with it. Passwordless authentication, if set up, will remain available. You'll also be able to sign in with your X(Twitter) login and password.
What for: To reduce the risk of being hacked.
A phone number linked to your account can be used to recover access. However, linking your phone number exposes you to SIM swapping where attackers exploit your carrier to gain access to your accounts. If you consider this threat relevant, remove your phone number:
- Click More in the menu on the left to view advanced settings;
- Open Settings and privacy;
- Go to the Your account section;
- Select Account information;
- Click Phone;
- In the window that opens, click Delete phone number;
- Follow the on-screen directions to confirm the action. Enter your account password or SMS verification code if asked to.
Downside: Without a linked phone number, you won't be able to recover access to your account via SMS if you lose your password.
How to keep corporations out of your business
What for: To use device resources sparingly and hide from cybercriminals.
X(Twitter) collects information about your approximate location based on your IP address to show you targeted ads and recommendations. This also helps you geotag your posts. Information about your location can help cybercriminals launch phishing attacks.
To turn off personalization based on places you've visited, disable the geotagging of new posts, delete previously saved location information, and hide content linked to your region:
- Click More in the menu on the left to view advanced settings;
- Open Settings and privacy;
- Select Privacy and safety;
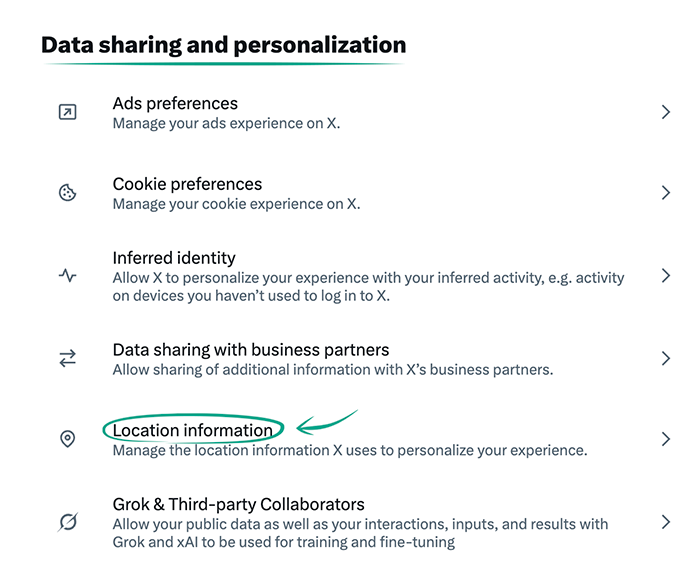
- Under Data sharing and personalization, select Location information;
- Turn off Personalize based on places you've been;
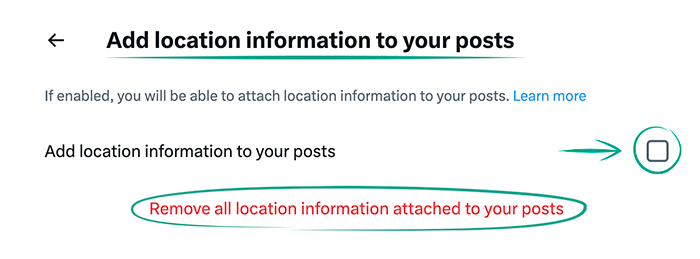
- Click Add location information to your posts;
- Under Add location information to your posts, turn off the option with the same name and click Remove all location information attached to your posts to remove geotags from previous posts;
- Under Explore settings, turn off Show content in this location.
You can stop the geotagging of new posts and remove previously saved location information without disabling content personalization or recommendations:
- Click More in the menu on the left to view advanced settings;
- Open Settings and privacy;
- Select Privacy and safety;
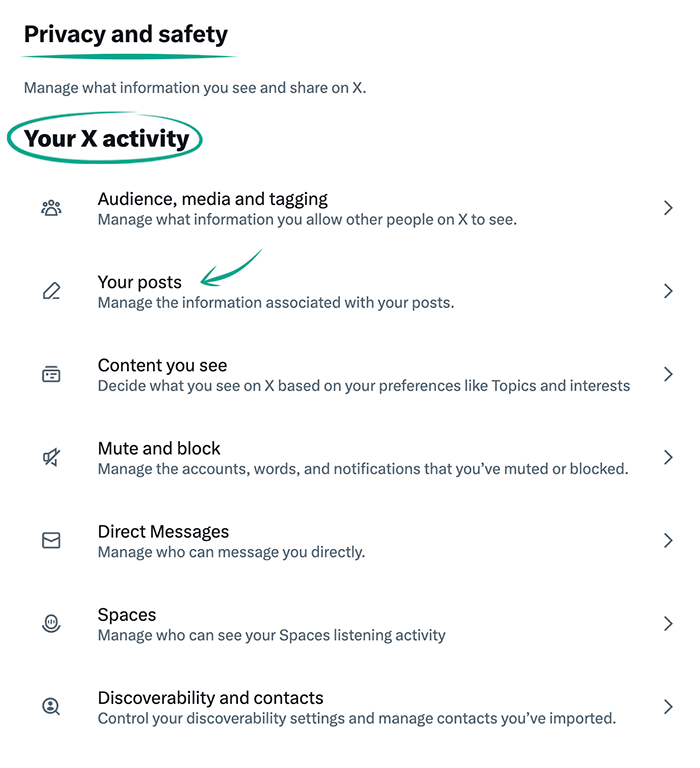
- Under Your X activity, click Your posts;
- Click Add location information to your posts;
- Under Add location information to your posts, turn off the option with the same name and click Remove all location information attached to your posts to remove geotags from previous posts.
Please note: Under Your X Activity you cannot disable personalization based on places you've visited or hide content linked to your location.
Downside: You will lose any geotags that you added to your posts in the iOS or Android app. However, if you enabled the Precise location feature in the X(Twitter) app on your mobile device, location settings in the Web version will not affect this feature.
What for: To minimize the risk of a leak.
X(Twitter) can collect information about your behavior, preferences, interest, and location, as well as other data. You cannot block access to the basic account info. This includes the name of your device, your social network activity and approximate location. This information is used to generate targeted ads and recommendations as well as to form the news feed.
However, X(Twitter) can analyze additional data and info. If you regularly use a phone and computer connected to the same network, X(Twitter) may conclude that you own both devices. If you use only one of the devices to sign in to X(Twitter), the social network may take into account, say, your browsing history from the other device.
Additional information includes:
- Places you visited and precise geographic coordinates;
- Information about your other browsers and devices, even if you haven't used them to log in to X(Twitter);
- Information about e-mail addresses and phone numbers that are not linked to your X(Twitter) account but presumably belong to you;
- Online browsing history;
- History of views and your interests.
Some of this information is provided by partners of the service. X(Twitter) itself can also share it with third parties. By default, the social network does not collect extended information, but we recommend checking the settings anyway.
To stop the app from collecting and using extended personalized information:
- Click More in the menu on the left to view advanced settings;
- Open Settings and privacy;
- Select Privacy and safety;
- Under Data sharing and personalization, click Ads preferences;
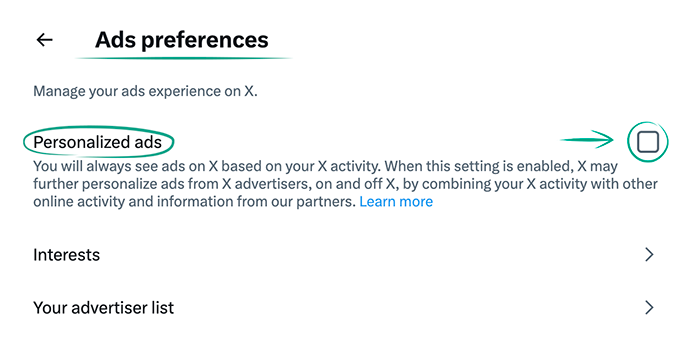
- Turn off Personalized ads;
- Click Interests and uncheck all options;
- Open Your advertiser list and uncheck all options;
- Go back to Data sharing and personalization;
- Select Inferred identity and turn off Personalize based on your inferred identity;
- Go back to Data sharing and personalization:
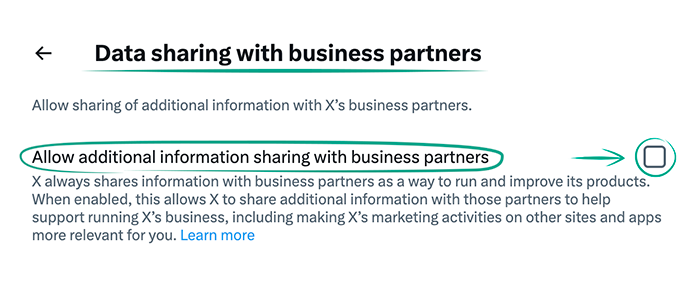
- Under Data sharing with business partners, turn off Allow additional information sharing with business partners;
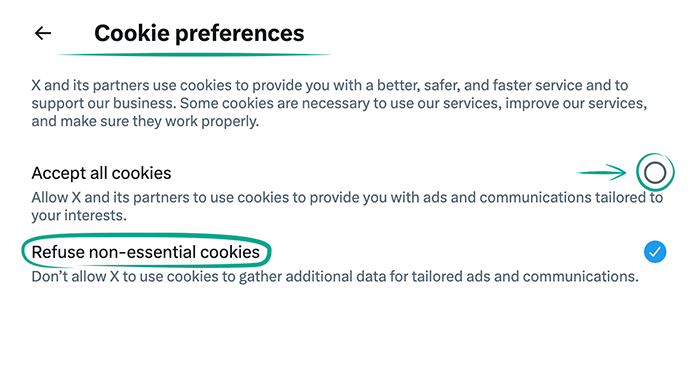
- Under Cookie preferences, select Refuse non-essential cookies. Accept all cookies will remain unchecked.
- Under Data sharing with business partners, turn off Allow additional information sharing with business partners;
Please note: Turning off these options does not disable content personalization. X(Twitter) will continue to take into account the name of your device, actions in the social network, and IP address. Access to this data cannot be disabled.
What for: So the AI knows less about you.
If you're a Grok user, X(Twitter)may share not only your public data but also information about your chats, entered queries, and received responses with xAI for AI training and improvement. Some of that data may be used to personalize your interactions with Grok. Besides, X(Twitter) may share your information with xAI's partners, which increases the risks of uncontrolled collection and processing of your data by third parties.
To stop xAI Grok from using your X(Twitter) data for training and customization:
- Click More in the menu on the left to view advanced settings;
- Open Settings and privacy;
- Select Privacy and safety;
- Under Data sharing and personalization, select Grok & Third-party Collaborators:
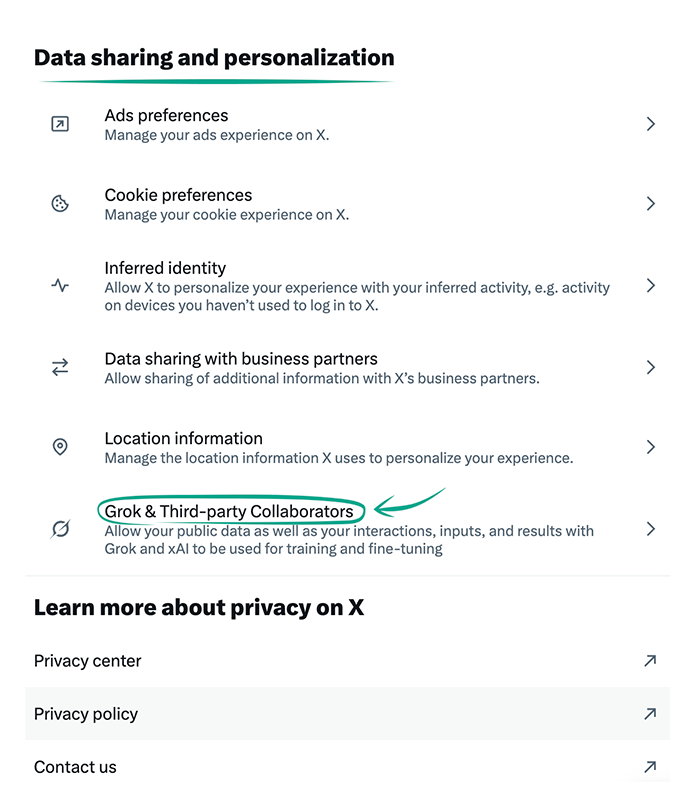
- Turn off Allow your public data as well as your interactions, inputs, and results with Grok and xAI to be used for training and fine-tuning;
- Turn off Allow X to personalize your experience with Grok;
- Turn off Allow Grok to remember your conversation history;
- You can also clean up your Grok chats by clicking Delete conversation history.
Downside: Deleting your chat history means you will start your conversations with Grok from scratch every time, and the AI will not be able to take into account the context of your past chats.
How to defeat spammers and trolls
What for: To keep your peace of mind.
You can stop posts containing specific words, hashtags, and smiley faces from appearing in your news feed and notifications. This lets you hide unwanted posts.
To configure the filter:
- Click More in the menu on the left to view advanced settings;
- Open Settings and privacy;
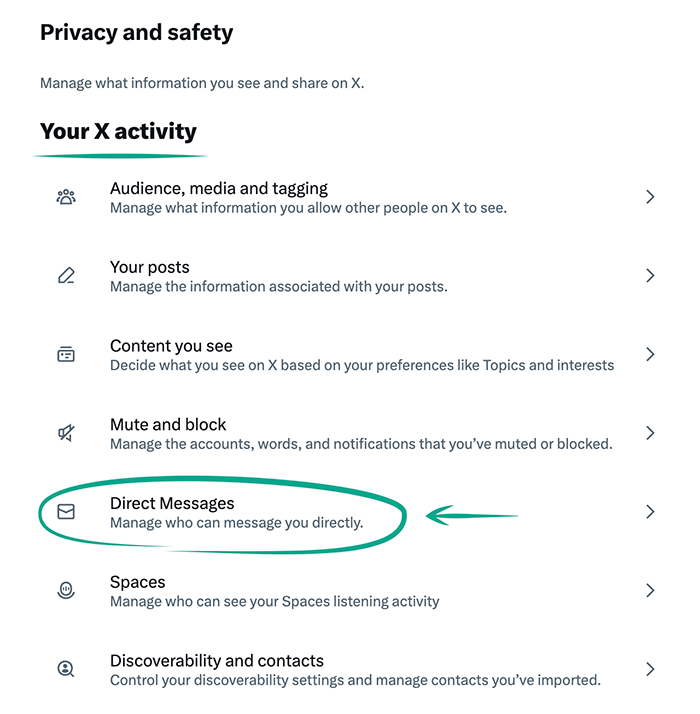
- Select Privacy and safety;
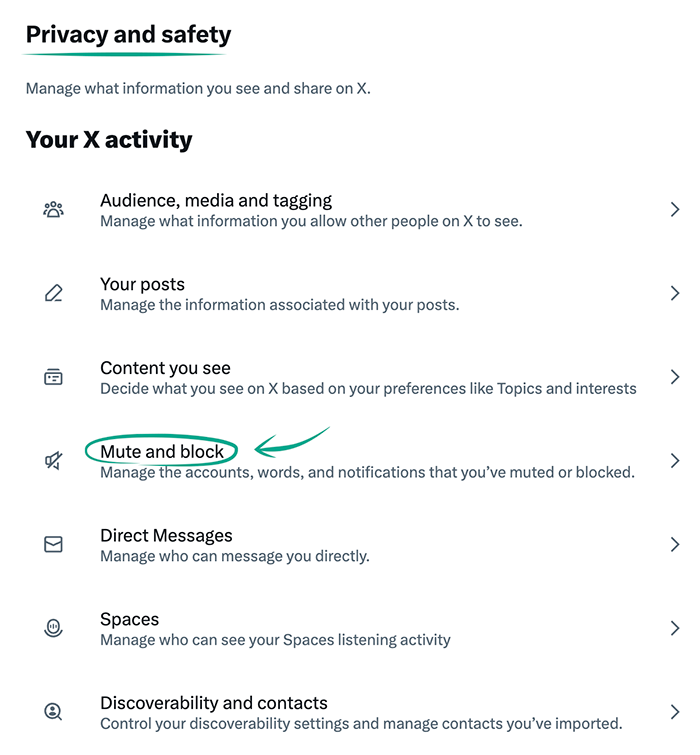
- In the Your X activity section, select Mute and block;
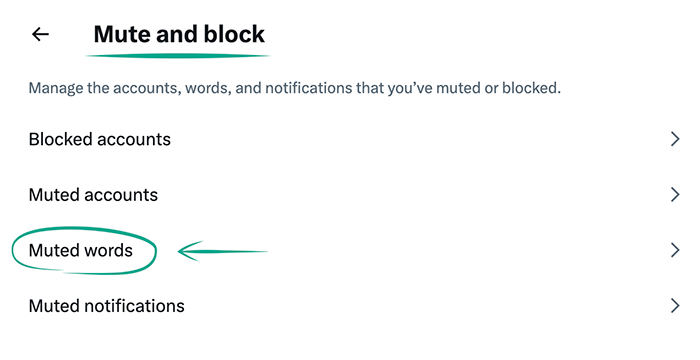
- Select Muted words;
- Click + in the upper right corner of the screen;
- In the opened window:
- Type in a word or phrase you don't want to see in posts;
- Check the box next to Home timeline;
- Turn on Notifications and select From anyone;
- Select Until you unmute the word;
- Click Save.
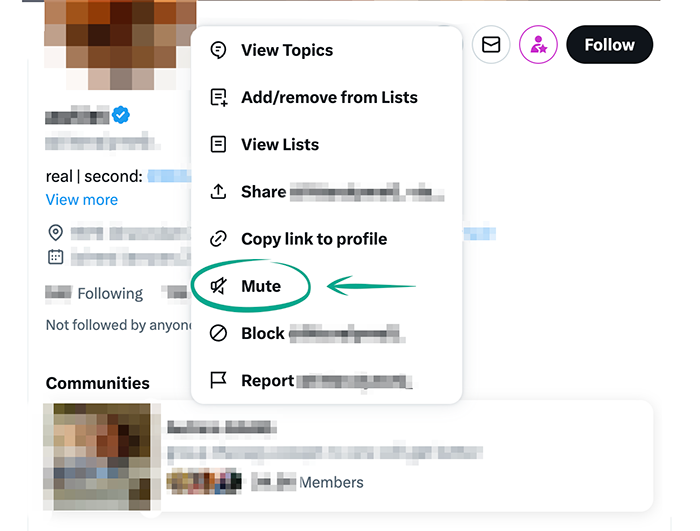
You can also configure the muting of posts, comments, and notifications from specific users:
- Open the user profile whose publications you want to mute;
- Click the three-dot icon to the right of the user's profile picture;
- Select Mute.
You can view the list of users you've muted by selecting Muted accounts in the Mute and block section.
What for: To exclude adult and graphic content from the notification feed.
X(Twitter) can filter out content it designates offensive. This feature is disabled by default. However, we recommend checking the settings:
- Click More in the menu on the left to view advanced settings;
- Open Settings and privacy;
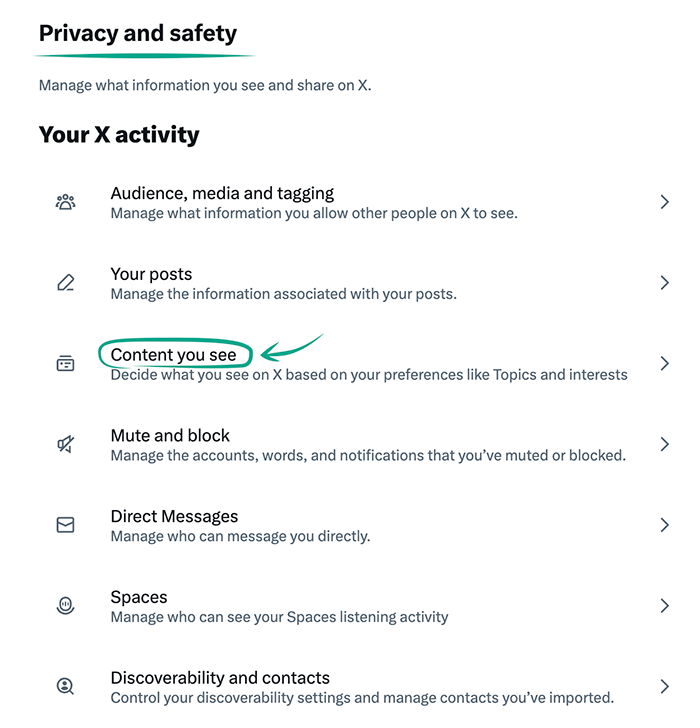
- Select Privacy and safety;
- Under Your X activity, click Content you see;
- Make sure the box next to Display media that may contain sensitive content is unchecked.
Keep in mind that you will still see such content in search results. To stop X(Twitter) from showing it in search results, do the following on the same page:
- Select Search settings;
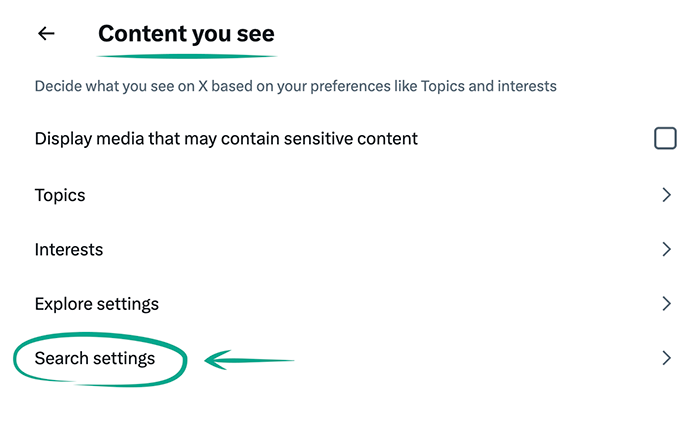
- Check the box next to Hide sensitive content.
What for: To limit unwanted communication.
Users you follow can always send you direct messages. However, you can limit message requests from those you don't follow:
- Click More in the menu on the left to view advanced settings;
- Open Settings and privacy;
- Select Privacy and safety;
- In the Your X activity section, select Direct Messages;
- Under Allow message requests from, select one of the options:
- No one;
- Verified users;
-
Everyone. If you've chosen Verified users or Everyone, check the box next to Filter low-quality messages.
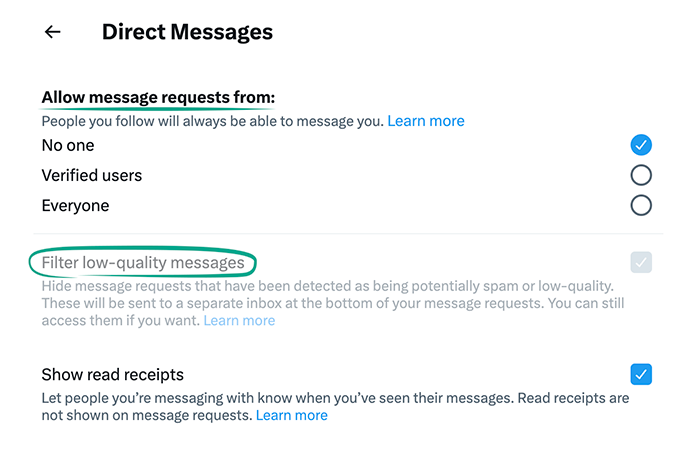
Users with whom you have already started chats will still be able to continue the dialog. Block users you don't want to receive direct messages from.
Please note: Companies and developers may send you direct messages requesting your location or access to media files. They use this information to configure recommendations. Note that this information can be shared with third parties, so treat such requests with care.
What for: To avoid seeing content in search results from users you have blocked.
If you block users, you will still be able to see their accounts in X(Twitter) search results. To exclude blocked accounts from search results:
- Click More in the menu on the left to view advanced settings;
- Open Settings and privacy;
- Select Privacy and safety;
- Under Your X activity, click Content you see;
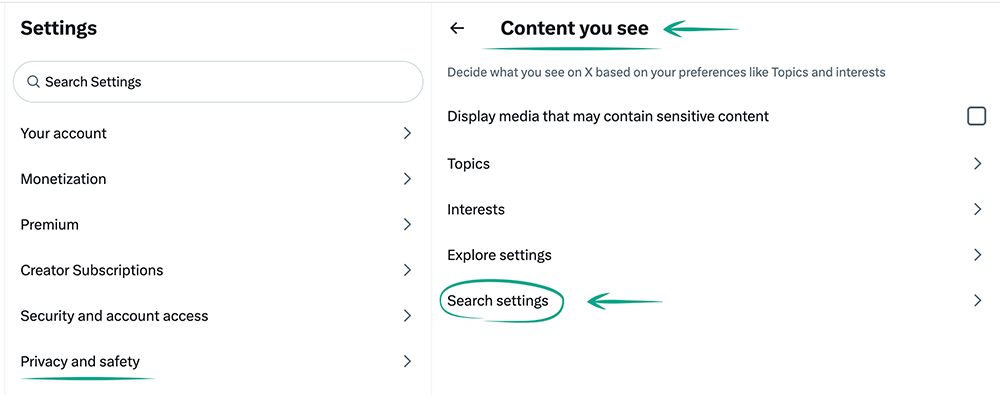
- Select Search settings;
- Enable the Remove blocked and muted accounts option.
How to hide posts from unwanted people
What for: To get rid of unwanted people in the virtual space.
To stop a specific user from viewing your posts and replying to them or sending you direct messages, you can block this user. The blocked user will not be able to view your profile or contact you.
To block a user:
- Go to the profile of the person you wish to block;
- Click the three-dot icon to the right of the user's profile picture;
- Select Block @user_name;
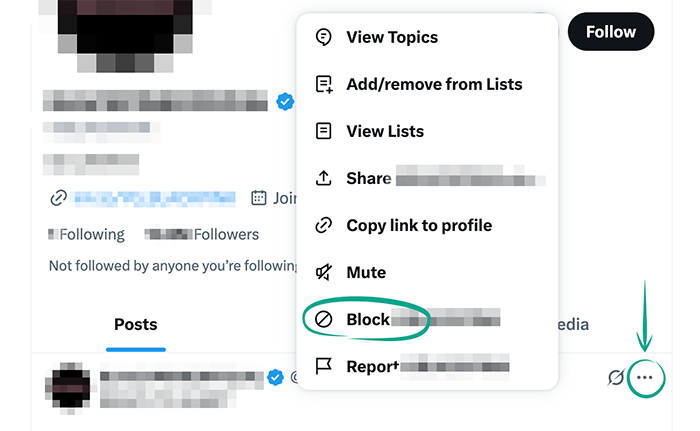
- Click Block.
A user you've blocked will continue to see your public posts and will be able to report you. However, they will automatically unfollow you and won't be able to send you direct messages — a failure pop-up will appear.
You can unblock a blocked user any time (for example, if you blocked the user by mistake):
- Click More in the menu on the left to view advanced settings;
- Open Settings and privacy;
- Select Privacy and safety;
- In the Your X activity section, select Mute and block;
- Select Blocked accounts and click Blocked to the right of the account that you wish to unblock.
How to prevent your personal data from being exposed
What for: To prevent your contact details from ending up in the hands of cybercriminals in the event of a leak.
X(Twitter) can use contact lists of your e-mail account and your mobile device to recommend users you might want to follow. The service also uses your contacts for ad targeting and to shape your news feed. This information can be shared with third parties, which increases the risk of leaks.
If you previously imported contact lists of your e-mail account or other services into X(Twitter), you can remove the imported contacts from the social network.
To remove contacts imported from contact lists:
- Click More in the menu on the left to view advanced settings;
- Open Settings and privacy;
- Select Privacy and safety;
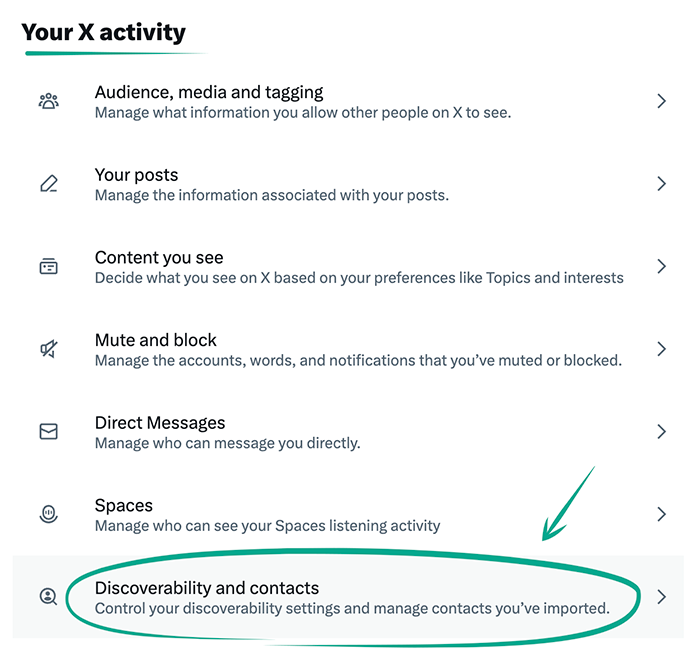
- Under Your X activity, click Discoverability and contacts;
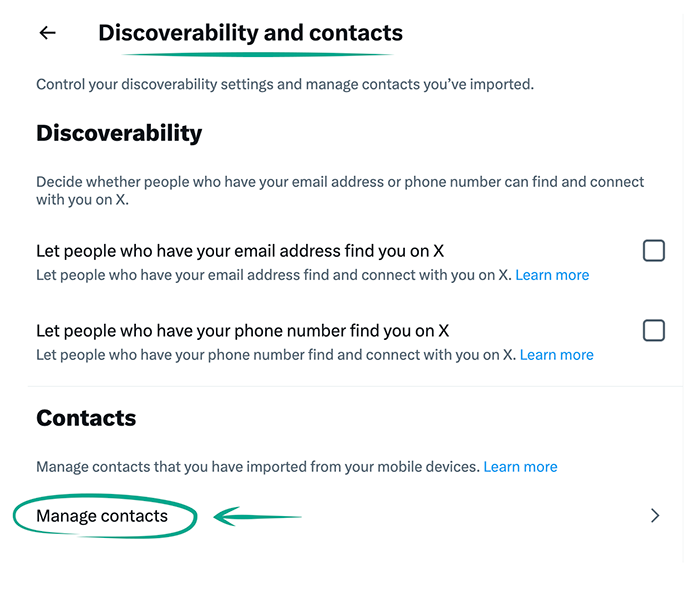
- Select Manage contacts;
- Enter your account password;
- Click Remove all contacts and confirm your selection.
Please note: After this, contact syncing will be disabled on all devices.
Downside: X(Twitter) will no longer be able to recommend accounts to follow from your contact list. However, you may still find some people from your contact list in suggestions.
What for: To keep cybercriminals from learning sensitive information.
By default, your posts are visible to everybody, even people who do not have an X(Twitter) account. Information from posts can help cybercriminals launch phishing attacks. You can restrict the visibility of your posts to everyone except approved followers via Your Account or Privacy and safety. Both options have the same effect.
To restrict the visibility of your posts via Your Account:
- Click More in the menu on the left to view advanced settings;
- Open Settings and privacy;
- Go to the Your account section;
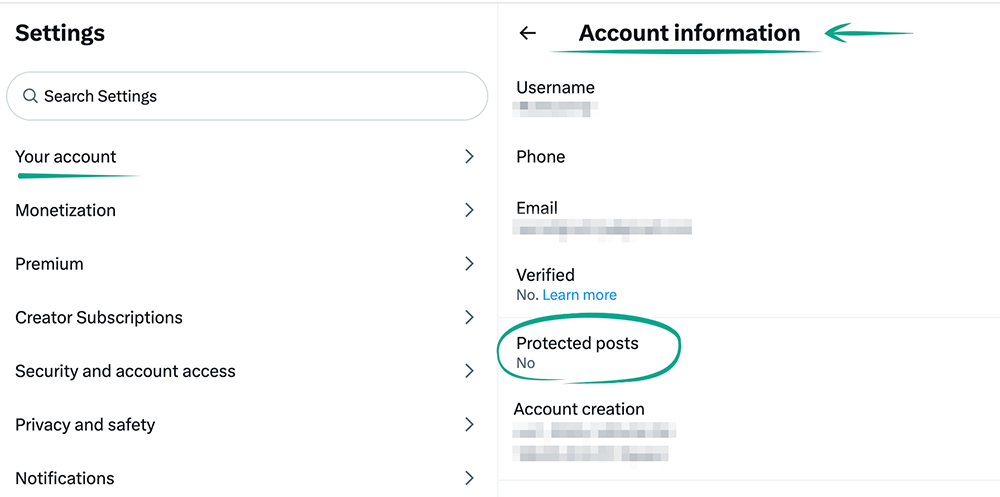
- Select Account information;
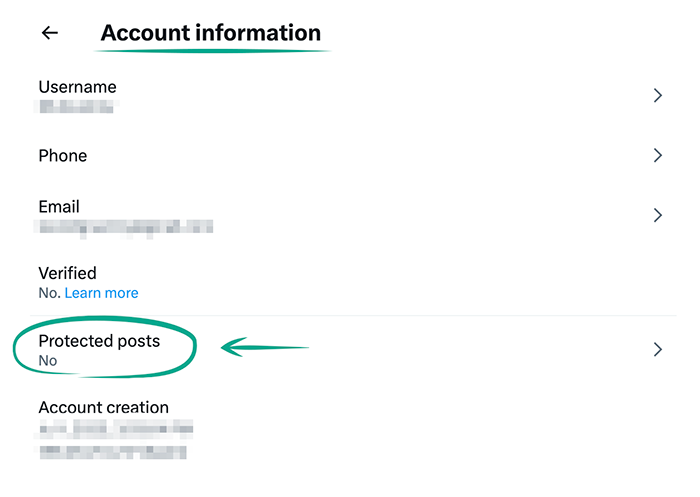
- Click Protected posts;
- Turn on Protect your posts;
- Click Protect.
To restrict the visibility of your posts via Privacy and safety:
- Click More in the menu on the left to view advanced settings;
- Open Settings and privacy;
- Select Privacy and safety;
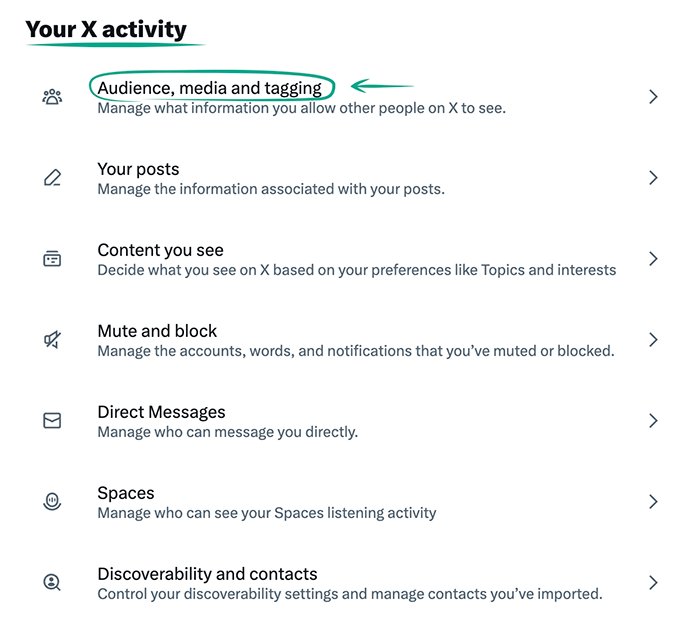
- Click Audience, media and tagging;
- Turn on Protect your posts;
- Click Protect.
Now X(Twitter) users who want to read your posts will have to submit a request and wait for your approval.
Also, people who were among your followers at the time when you made your profile private will continue to see your posts, but will not be able to share them.
What for: So scammers can't abuse the data in your account.
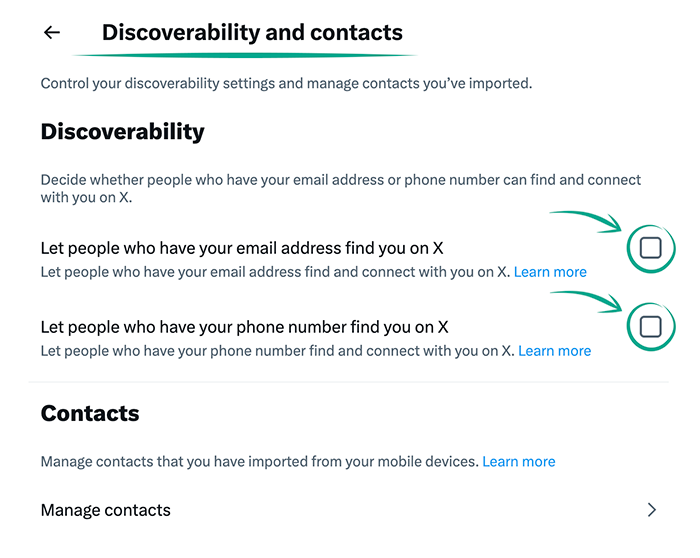
By default, other X(Twitter) users can find your account using your phone number or e-mail address. Information from your profile can help cybercriminals stage phishing attacks, so we recommend disabling this feature.
To stop users from finding your account using your phone number or e-mail address:
- Click More in the menu on the left to view advanced settings;
- Open Settings and privacy;
- Select Privacy and safety;
- Under Your X activity, click Discoverability and contacts;
- Disable the options:
- Let people who have your email address find you on X;
-
Let people who have your phone number find you on X.
Downside: Other users will have a harder time finding your X(Twitter) account.
What for: To control who has access to information about you.
By default, all X(Twitter) users can tag you in photos. If you get tagged by a person whom you follow, the post will appear in your timeline. In this way, your information can become available to strangers. To prevent users from tagging you in images they post, go to Your Account or Privacy and Safety.
To prevent users from tagging you in photos via Your Account:
- Click More in the menu on the left to view advanced settings;
- Open Settings and privacy;
- Go to the Your account section;
- Select Account information;
- Click Protected posts;
- Click Photo tagging;
- Disable the Photo tagging option.
To prevent users from tagging you in photos via Privacy and safety:
- Click More in the menu on the left to view advanced settings;
- Open Settings and privacy;
- Select Privacy and safety;
- Under Your X activity, click Audience, media and tagging;
- Click Photo tagging;
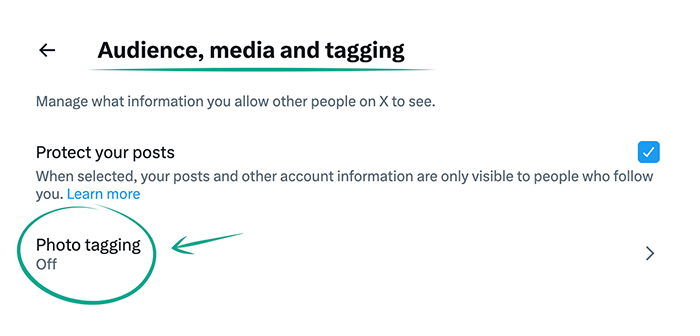
- Disable the Photo tagging option.
View photos in which you are tagged in the All section in the notification feed (bell icon). If necessary, you can remove the tag:
- Click the button with three dots to the right of the post author's name;
- Select Remove tag from photo;
- Click Remove again to confirm your selection.
What for: To retain control over your content.
The web-based X(Twitter) application doesn't let you disable the downloading of videos you've uploaded. Use the iOS or Android instructions instead.
If you disable video downloading, X(Twitter) users won't be able to download your videos directly or post them on other websites, but they'll be able to share a link to your post.
Please note: Since July 25, 2023, all new videos on X(Twitter) have been available for download to Premium subscribers by default. Videos uploaded prior to that date are unavailable for download. For account owners under 18, the ability to download videos is automatically turned off and cannot be enabled.
What for: To reduce the risk of a leak.
If you linked other sites or apps to X(Twitter), such as apps for finding followers or counting reposts, they can obtain access to your data. In some cases they may also be able to like posts and follow or unfollow accounts on your behalf.
Such sites and apps do not normally inform you explicitly about the specific permissions you grant them.
You can deny third-party apps and sites access to your data in order to rule out any unauthorized activity in your account and lower the risk of data leaks.
To disable access to your account for third-party services:
- Click More in the menu on the left to view advanced settings;
- Open Settings and privacy;
- In the Security and account access section, select Apps and sessions;
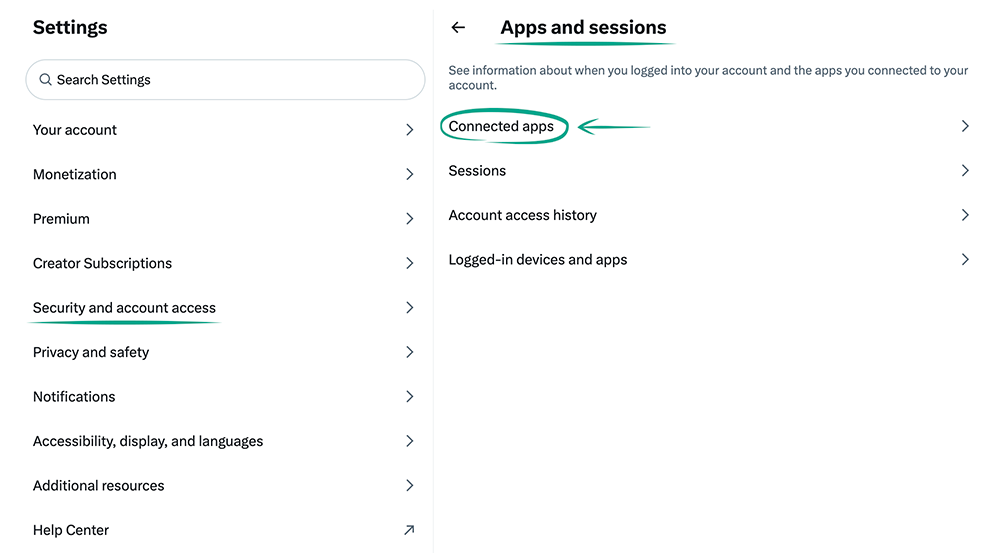
- Select Connected apps;
- Check the list of apps and sites that have access to your profile and block the ones you do not use:
- Click the arrow to the right of the app name;
- Select Revoke app permissions.
What for: So unauthorized users cannot impersonate you.
X(Twitter) allows you to delegate access to your account to others and assign them as a contributor or admin. Contributors can post, send direct messages, and create lists on your behalf, as well as view your direct messages, posts, and lists. Admins, in addition to these privileges, can invite and remove others and view post analytics.
If an untrustworthy user or attacker gains access, they could post questionable content that harms your reputation and attempt to deceive other users in your name.
To disable delegation:
- Click More in the menu on the left to view advanced settings;
- Open Settings and privacy;
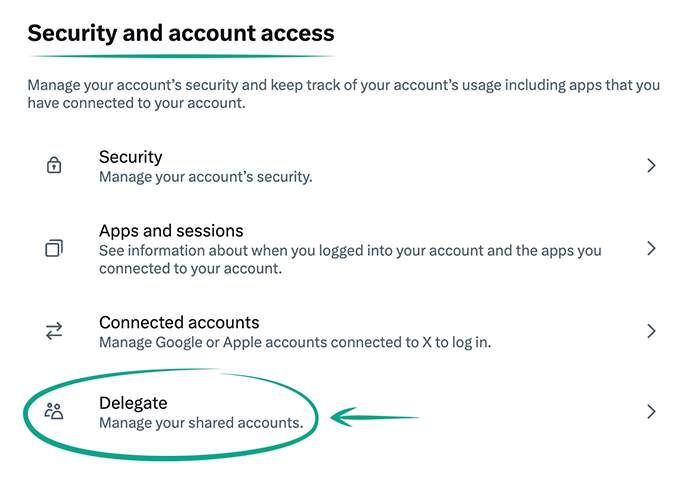
- Under Security and account access, click Delegate;
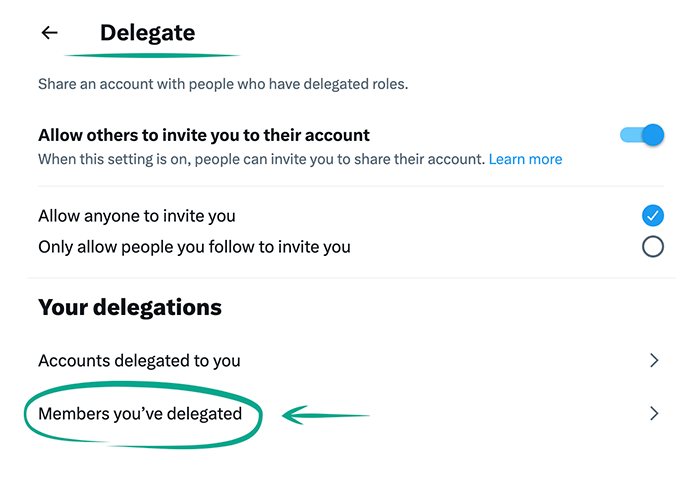
- Under Your delegations, click Members you've delegated;
- Review the list of users you've delegated access to;
- To remove access from a user, click the three dots to the right of their name, then click Remove from group;
- Click Revoke All.
You can change the user's role from admin to contributor to restrict their permissions:
- Click More in the menu on the left to view advanced settings;
- Open Settings and privacy;
- Under Security and account access, select Delegate;
- Under Your delegations, select Members you've delegated;
- Click the three dots to the right of the username, whose role you want to change and click Change role;
- In the Change this member's role window, select Contributor.
To give up the permissions delegated to you by another user:
- Click More in the menu on the left to view advanced settings;
- Open Settings and privacy;
- Under Security and account access, select Delegate;
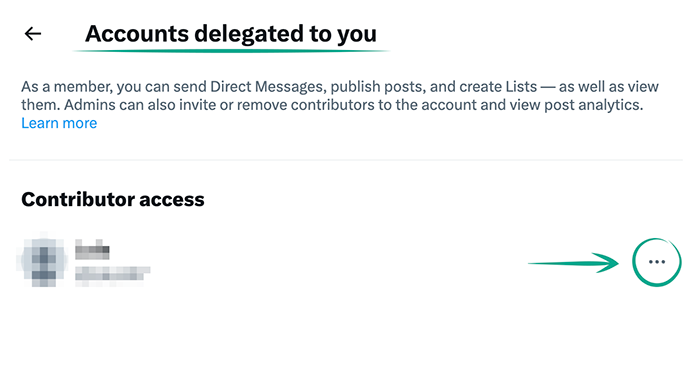
- Under Your delegations, select Accounts delegated to you;
- Review the list of users who have delegated their accounts to you;
- To give up the account access delegated to you by another user, click the three dots next to the account owner's name and, in the window that opens, click Leave account;
- Click Leave.
To avoid unwanted notifications, you can restrict who can invite you to manage their accounts. To either block all users from sending invitations or allow only those you follow to do so:
- Click More in the menu on the left to view advanced settings;
- Open Settings and privacy;
- Under Security and account access, select Delegate;
- To stop invitations completely, turn off Allow others to invite you to their account;
- To limit who can invite you, select Only allow people you follow to invite you below.
What for: So they can't find out your interests.
X(Twitter) offers Spaces — voice channels that hosts, co-hosts, and listeners can join. You can disable the option for your followers to see which Space you've joined.
Please note: Spaces are public, and any user can join any Space as a listener. When you're in a Space, other listeners can always see you. If you're speaking in a Space, your followers will see this.
To stop your followers from seeing what Space you're in:
- Click More in the menu on the left to view advanced settings;
- Open Settings and privacy;
- Select Privacy and safety;
- Under Your X activity, select Spaces;
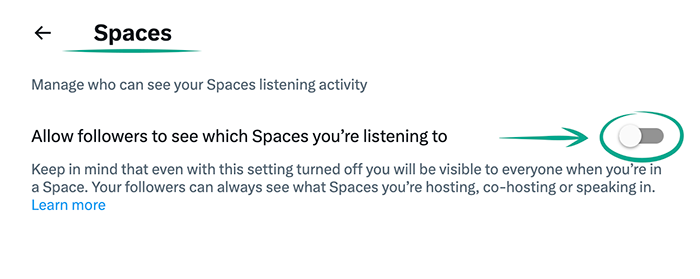
- Turn off Allow followers see which Spaces you're listening to.
What for: To minimize the risk of a personal data breach.
In some cases, X(Twitter) may ask you to upload a government-issued ID — for example, to obtain a verified badge and access advanced features (when purchasing an X Premium subscription), to investigate complaints and moderate content (for instance, in disputes over impersonation or certain types of ads verification), or to participate in monetization programs (like subscriptions and ad revenue sharing). Additionally, X(Twitter) offers the option to voluntarily verify your identity for increased trust in your account.
We recommend submitting documents only when truly necessary. This is sensitive personal information, and its exposure can result in significant risks.
What for: To see what information X(Twitter) has on you and create a backup copy of important data.
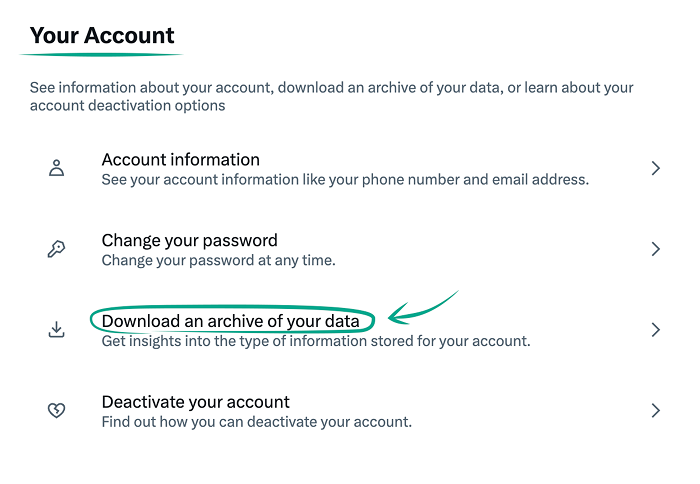
X(Twitter) can generate for you a file with all your profile data. This will let you find out what kind of information the service collects about you as well as save it in case your account gets blocked, removed, or hijacked.
To download an archive with your data:
- Click More in the menu on the left to view advanced settings;
- Open Settings and privacy;
- Go to the Your account section;
- Select Download an archive of your data;
- Enter your password and click Next;
- Click Send Code;
- A verification code will be sent to the e-mail address linked to your X account. Type it in and click Next;
- Click Request archive.
Here you can also download data of your Periscope account if you used it for direct broadcasts in Twitter.
It may take up to 24 hours to prepare the archive. You'll be able to download the archive with your data on the same page.
What for: To prevent your personal information from ending up in the wrong hands.
Cybercriminals can use your account data to stage phishing attacks, and X(Twitter) can use it to configure ads and recommendations. You can limit the scope of publicly available information or refrain from specifying your real info.
To change the profile data:
- Click More in the menu on the left to view advanced settings;
- Open Settings and privacy;
- Go to the Your account section;
- Select Account information;
- Click Birth date. The Edit profile window opens;
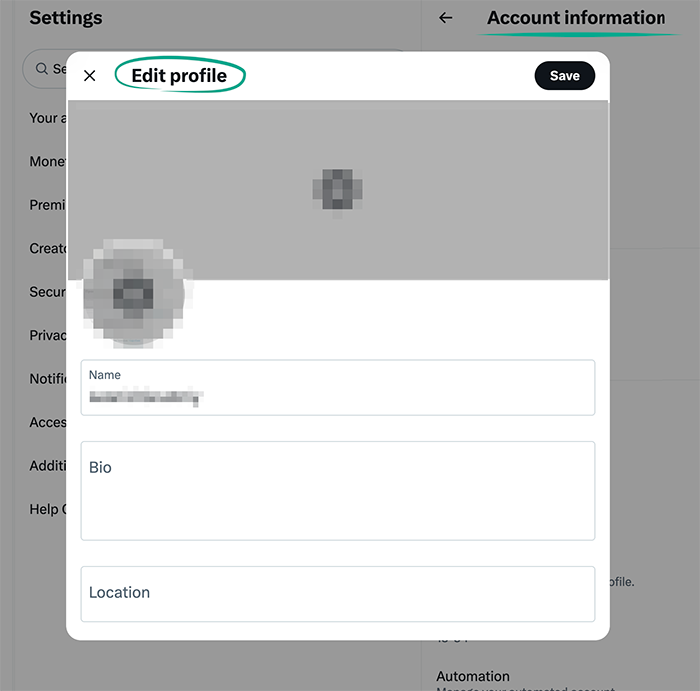
- Click your profile photo and upload any image that makes it impossible to determine that the account belongs specifically to you;
- In the Name field, enter an alias;
- Remove data from the fields:
- Bio;
- Location;
- Website.
- Click the birth date, then Edit;
- Click Remove birth date and select Remove;
- Click Edit expanded bio and remove all information from About and Work History:
- Click the red recycle bin next to About, then Confirm;
- Click the red recycle bin next to each item in Work History, then Confirm;
- Click the arrow in the upper left corner of the screen to return to Edit profile;
- Click Save in the upper right corner of the profile changes page.
Change your X(Twitter) username too if it resembles your real name:
- Click More in the menu on the left to view advanced settings;
- Open Settings and privacy;
- Go to the Your account section;
- Select Account information;
- Click Username;
- Type in a new username or select one of the Suggestions;
- Click Save.
How to get rid of unwanted notifications
What for: To avoid distractions.
By default, X(Twitter) sends you notifications about the actions of other users that it deems most interesting. If these notifications distract you, you can stop the app from notifying you about activities of specific user categories, e.g. those who have not confirmed their contact details (spammers often avoid doing this to save time):
- Click More in the menu on the left to view advanced settings;
- Open Settings and privacy;
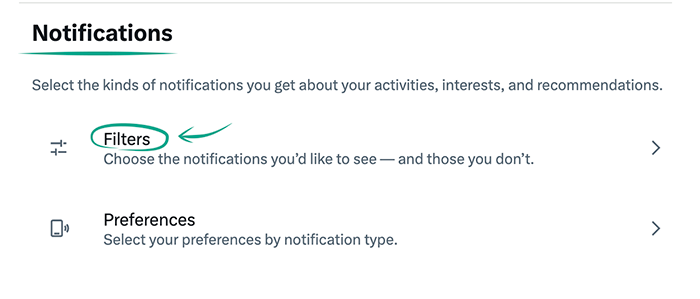
- Go to the Notifications section;
- Select Filters;
- Turn on Quality filter;
- Click Muted notifications and turn on:
- You don't follow;
- Who don't follow you;
- With a new account;
- Who have a default profile photo;
- Who haven't confirmed their e-mail;
- Who haven't confirmed their phone number.
Downside: The filter does not apply to accounts that you follow or with which you recently interacted.
What for: To ensure your peace of mind.
X(Twitter) can send you browser notifications and e-mails. Some of the notifications are marketing materials about recommended products, including from X(Twitter) partners.
To stop receiving such notifications:
- Click More in the menu on the left to view advanced settings;
- Open Settings and privacy;
- Go to the Notifications section;
- Open Preferences;
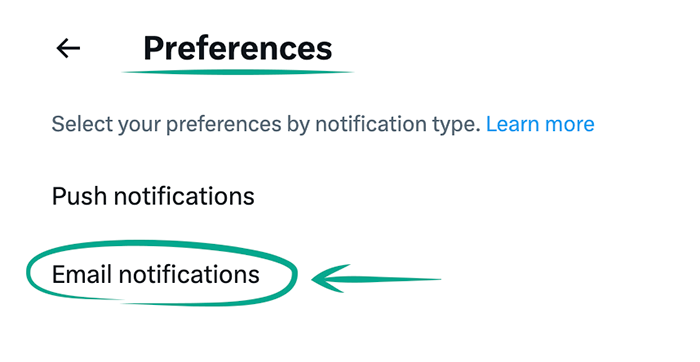
- Select Email notifications;
- Disable the options:
- News about X product and feature updates;
- Tips on getting more out of X;
- Things you missed since you last logged into X;
- News about X on partner products and other third party services;
- Participation in X research surveys;
- Suggestions for recommended accounts;
- Suggestions based on your recent follows;
- Tips on X business products.
We recommend reviewing other notification categories and disabling those that you do not want to receive.
Downside: Some notifications may contain information about service features and useful tips on using the platform.
What for: To reduce distractions.
X(Twitter) can notify you about new likes, replies, direct messages, and even the activities of people you follow. Notifications can be distracting and annoying, especially if you use X a lot. To help you stay focused, we recommend turning off unnecessary push notifications. All of them will remain available within the app, and you can view them at your convenience.
To turn off all push notifications at once:
- Click More in the menu on the left to view advanced settings;
- Open Settings and privacy;
- Go to the Notifications section;
- Open Preferences;
- Click Push notifications and turn off the toggle switch next to Push notifications at the top of the page.
To turn off notifications selectively:
- Click More in the menu on the left to view advanced settings;
- Open Settings and privacy;
- Go to the Notifications section;
- Open Preferences;
- Select Push notifications. In this menu, you can turn off notification types one by one;
- Under Related to you and your posts:
- Uncheck the boxes next to the options you don't need:
- Posts;
- Photo tags;
- New followers;
- Direct Messages;
- Contact joins X;
- Select Offor Tailored for you for:
- Mentions and replies;
- Reposts;
- Likes;
- Message reactions;
- Uncheck the boxes next to the options you don't need:
- Under From X:
- Uncheck the boxes next to the options you don't need:
- Topics;
- News / Sports;
- Recommendations;
- Moments;
- Broadcasts & Spaces;
- Other live broadcasts;
- Uncheck the boxes next to the options you don't need:
- Under X for Professionals:
- Uncheck the box next to Ads campaigns if you don't want to receive these notifications.
We recommend keeping the box next to Crisis and emergency alerts under From X checked.
Note that you'll get Posts notifications only from users you follow and if you have enabled notifications for them by clicking the bell icon next to Following on their profiles. To review the list of these users, click View users below the description of the Posts option.
To disable all e-mail notifications at once:
- Click More in the menu on the left to view advanced settings;
- Open Settings and privacy;
- Go to the Notifications section;
- Open Preferences;
- Click Email notifications and turn off the Email notifications toggle switch at the top of the page.
To unsubscribe from e-mail notifications selectively:
- Click More in the menu on the left to view advanced settings;
- Open Settings and privacy;
- Go to the Notifications section;
- Open Preferences;
- Select Email notifications;
- In this menu, you can turn off notification types one by one. Uncheck the boxes next to the options you want to unsubscribe from:
- New notifications;
- Direct Messages;
- Posts emailed to you;
- Updates about the performance of your posts.
- Under Top posts and Stories in the same section, set the frequency of receiving this type of content: Daily, Weekly, Periodically, or Off.
We recommend reviewing other e-mail notifications under From X and turning off the ones you don't want to get.