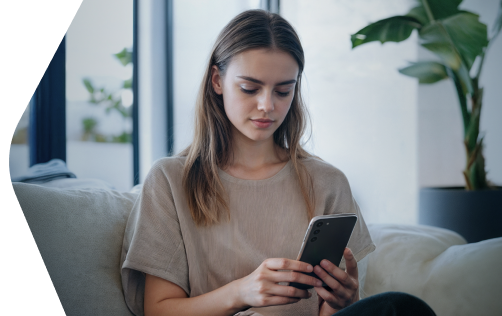

How to keep your account from getting hacked
What for: So you don't get hacked.
If you use a short and simple password on Instagram, cybercriminals can guess it and hijack your account. A long and complex password is more secure. Use a strong password that:
- Is at least 8 and up to 20 characters long;
- Contains lowercase and uppercase letters, numbers, and special characters ($, @, etc.);
- Is not an actual word or easy-to-guess phrase;
- Is not the same as your passwords for any other accounts;
- Does not consist of information that strangers could easily find out (your name, date of birth, pet's name, and so forth — or those of your friends or relatives).
To change your password:
- Click the three-stripe icon in the lower left part of the screen;
- Select Settings;
- Click Accounts Center in the menu on the left;

- Click Password and security in the menu on the left;
- Select Change password;
- Click your account name;
- Enter your current Instagram password;
- Enter a new strong password twice;
- Click Change password.
What for: So you definitely don't get hacked.
If you enable two-factor authentication, Instagram may ask for a one-time passcode in addition to your password during login. That way, even if cybercriminals learn your username and password, they won't be able to use them. The code is sent to your specified phone number or generated in a dedicated app you need to install separately.
To enable two-factor authentication:
- Click the three-stripe icon in the lower left part of the screen;
- Select Settings;
- Click Accounts Center in the menu on the left;
- Click Password and security in the menu on the left;
- Select Two-factor authentication;

- Click your account name. The service may ask you to enter your account password or verification code that it'll send to your e-mail or phone;
- Enter your current Instagram password;
- Click Continue;
- Select how you want to receive the one-time code:
- Authentication app: Download an authenticator app like Kaspersky Password Manager (if you have a subscription) or Google Authenticator. Scan the QR code or copy the Instagram key and enter the verification code from the app;
- SMS or WhatsApp: If you don't have a phone number linked to your account, you'll need to enter one and click Next. Then, enter the code you receive on your phone.
- Under Two-factor authentication, select a backup 2FA method in case you're unable to use your main one.
With two-factor authentication, you can log in to your account even if you lose your phone. Use recovery codes for that. Each of the ten codes can be used only once. Write them down or take a screenshot, and keep the information in a safe place. To get your codes:
- Click the three-stripe icon in the lower left part of the screen;
- Select Settings;
- Click Accounts Center in the menu on the left;
- Click Password and security in the menu on the left;
- Select Two-factor authentication;
- Click your account name;
- Click Additional methods;
- Select Backup codes;

- Select Download codes or Get new codes.
To add your device to the list of trusted devices, click Trust this device after entering your credentials to log in to your account. Be careful and do not do this if you are logging in to your account from someone else's device. If a device you've marked as trusted falls into someone else's hands, they'll be able to log in to your account, bypassing two-factor authentication.
To avoid this scenario, periodically check your trusted devices list and keep only those you are currently using:
- Click the three-stripe icon in the lower left part of the screen;
- Select Settings;
- Click Accounts Center in the menu on the left;
- Click Password and security in the menu on the left;
- Select Two-factor authentication;
- Click your account name;
- Click Trusted devices;
- A list of all devices considered trusted will open. The list shows the login method, operating system, and login location and time. If you see a device you don't recognize, click to remove it;
- Click Remove device.
What for: To take timely security measures.
If you've logged in from someone else's device or you suspect that your account might have been hacked, you can review the activity log in your profile to see if a bad actor has done anything on your behalf and roll back all you find inappropriate. You can also review the list of your active sessions, customize security alerts, and terminate sessions you don't recognize or no longer need.
To view the log or roll back actions:
- Click the three-stripe icon in the lower left part of the screen;
- Select Your activity;
- To view the details of the various types of interactions, switch between tabs in Interactions:

- Likes;
- Comments;
- Story replies;
- Reviews.
- To view post details, switch between tabs in Photos and videos:
- Posts;
- Reels;
- Highlights.
- To view the timeline of key changes made to your Instagram profile, open Account history.
To view a list of active sessions and terminate the ones you don't need:
- Click the three-stripe icon in the lower left part of the screen;
- Select Settings;
- Click Accounts Center in the menu on the left;
- Click Password and security in the menu on the left;
- Select Where you're logged in;

- Select your Instagram account. The Account login activity page will open, showing your current and other active sessions;
- To terminate a session, click Select devices to log out;
- Select the relevant session;
- Click Log out;
- Confirm your choice.
Alternatively, you can do this on your profile page:
- Go to your profile by clicking your profile picture in the lower left or upper right part of the screen;
- Click the gear icon to the right of your profile name at the top center of the screen;
- Click Login activity;
- Click a session you don't need;
- Click Log out at the bottom.
To enable security alerts when logging in to your account on a new device:
- Click the three-stripe icon in the lower left part of the screen;
- Select Settings;
- Click Accounts Center in the menu on the left;
- Click Password and security in the menu on the left;
- Click Login alerts;
- Click your account name;
- Check In-app notifications and Email;
- Click Save changes.
What for: So nobody else can log in to your account.
Instagram lets you save account login credentials on the device so you don't have to enter the login and password every time. If your device ends up in the hands of strangers, other people can access your account. To prevent this, you can turn off saved login info.
You can check whether your login info is being saved:
- Click the three-stripe icon in the lower left part of the screen;
- Select Settings;
- Click Accounts Center in the menu on the left;
- Click Password and security in the menu on the left;
- Click Saved login;

- If Saved login is on, toggle it off.
Turning this off will remove your saved login info. You can also remove your saved info as a one-time action after logging out. For example, if you've logged in to your account from someone else's device and you want to make sure the owner won't be able to access your account. To remove your login info this one time:
- Go to your profile by clicking your profile picture in the lower left or upper right part of the screen;
- Click the gear icon to the right of your profile name at the top center of the screen;
- Click Log Out;
- A page with your profile picture opens;
- Click the gear icon in the upper right corner;
- Click Remove and confirm.
Please note: You should decline to save your login when logging in to or out of your account.
What for: To prevent the loss of one account from causing the loss of all other accounts.
Instagram lets you link your account to profiles on other Meta platforms. This lets you automatically share your posts on other social networks. If cybercriminals hack your Instagram account, they will be able to publish posts on your behalf on related networks. Meanwhile, if cybercriminals find out the login and password for your Facebook account, they will be able to hijack your Instagram account.
To disable Connected experiences across Meta platforms:
- Click the three-stripe icon in the lower left part of the screen;
- Select Settings;
- Click Accounts Center in the menu on the left;
- Click Connected experiences;
- Click Sharing across profiles;

- This displays a list of your Meta profiles. For each of the profiles:
- Click your profile picture;
- Toggle off Your Instagram posts;
- Toggle off Your Instagram story.
- Go back to Connected experiences;
- Click Memories from Instagram;
- Toggle off the option to the right of your Instagram profile picture;
- Go back to Connected experiences;
- Click Showing links for your profiles;
- This displays a list of your Meta profiles. For each of the profiles:
- Click your profile picture;
- Turn off showing links to your profiles.
Please note: If your Accounts Center contains two or more accounts for different Meta products, the ability to log in to one using the credentials of another is enabled by default. There's no way to disable it.
To prevent unauthorized access via linked Meta accounts, remove them from the Accounts Center:
- Click the three-stripe icon in the lower-left part of the screen;
- Select Settings;
- Click Accounts Center in the menu on the left;
- Click Accounts in the menu on the left;
- Click Remove next to each Meta account;
- Click Remove account;

- Click Continue;
- Click Yes, finish removing.
Downside: Disabling cross-service functions and deleting a Meta account will prevent you from sharing posts simultaneously in several services. You will also no longer be able to restore access to Instagram using your Facebook profile.
What for: To reduce the risk of being hacked.
You can use the phone number linked to your account as the primary login or recovery method. However, linking your phone number exposes you to SIM swapping where attackers exploit your carrier to gain access to your data. If you consider this threat relevant, remove your phone number:
- Click the three-stripe icon in the lower left part of the screen;
- Select Settings;
- Click Accounts Center in the menu on the left;
- Click Personal details;
- Select Contact info;

- Click your phone number;
- Select Delete number;
- Click Delete to confirm.
Downside: You'll no longer be able to use one-time codes sent to your phone as the primary login method or as one of the two-factor authentication methods.
How to protect your money
What for: Not to lose money.
Instagram users can spend money directly on the social network — for example, to buy ads. To this end, Instagram requests and stores details of a bank card or PayPal account. However, if your account gets compromised by a leak or gets hacked, your financial info can end up in the hands of cybercriminals.
To remove stored bank card and e-wallet data:
- Click the three-stripe icon in the lower left part of the screen;
- Select Settings;
- Click Accounts Center in the menu on the left;
- Click Meta Pay;

- Go to the Manage tab;
- Click a card or PayPal account in the list;
- Click Edit;
- Click Delete.
Downside: After removing cards and accounts you will not be able to order ads or make purchases on Instagram. However, you can still buy goods on pages of stores if payment is processed on the merchant's website.
How to keep corporations out of your business
What for: So Instagram does not know more than it needs to.
If you enabled contact syncing in Instagram for iOS or Android, the social network uses your contacts to suggest you to follow accounts of people you know or to create targeted ads. Such data is passed on to others, including third parties, leading to an increased risk of data leaks. The Instagram Web interface lets you remove any contacts previously synchronized with the service:
- Click the three-stripe icon in the lower left part of the screen;
- Select Settings;
- Click Accounts Center in the menu on the left;
- Click Your information and permissions;
- Select Manage contacts;

- Click Delete All;
- Confirm your choice.
Downside: Without access to the contact list, Instagram will no longer be able to advise you to follow the accounts of your friends in your contact list.
Please note: If contact syncing is enabled in your Instagram mobile app, your contacts will be automatically re-uploaded to the service after some time. To disable this option, follow the steps for the Instagram Android or iOS app.
Additionally, if Facebook, Messenger, or WhatsApp have access to your contacts, Meta may use this data across Instagram as well. To avoid this, disable access to contacts for all Meta apps on all devices that have a contact list. To check what contacts have been uploaded to your account and delete the ones you don't want there, follow the link to Messenger.
What for: To stop Instagram from tracking your activity outside the platform.
Platform partners share information with Instagram regarding your activity on their websites and mobile apps, including your advertising ID, e-mail address, or phone number — depending on what they have access to. If this information matches your account details, Instagram maintains a log of your online activity and may show you personalized ads based on your interactions with partner services.
To clear the activity log and stop Instagram from using information about your online activity for personalizing ads:
- Click the three-stripe icon in the lower left part of the screen;
- Select Settings;
- Click Accounts Center in the menu on the left;
- Select Your information and permissions;
- Click Your activity off Meta technologies;
- Click Clear previous activity and confirm;

- Go back to Your activity off Meta technologies;
- Click Manage future activity;
- Select Disconnect future activity;
- Click Continue and confirm.
Note that the updated settings will take effect within two days. The amount of ads will remain unchanged, but they'll no longer consider your activity outside of Instagram. The service will still receive information about your online activity from partners, but it'll stop using it for ad targeting.
What for: To restrict what Facebook and its partners know about you.
Instagram and its advertising partners may use information about your activity on the platform, personal details in your profile, and other data to select ads specifically tailored to your interests. If targeted ads bother you, disable the use of your details and information about your actions on Instagram:
- Click the three-stripe icon in the lower left part of the screen;
- Select Settings;
- Click Accounts Center in the menu on the left;
- Click Ad preferences. You'll land on the Customize ads tab;
- Go to the Manage info tab;
- Under Information used to show you ads, click Categories used to reach you;
- In the window that opens, toggle off Employer, Job title, Education, and Relationship status:
- Click a category;
- Select No.
- Under Categories associated with you, click View all below the category list;

- Click Remove next to each category;
- Go back to the Manage info tab;
- Click Activity information from ad partners;
- Click Review setting;
- Select No, don't make my ads more relevant by using this information;
- Click Confirm;
- Select Audience-based advertising to see the list of advertisers who have included you in their target audience based on your personal information;
- For each advertiser individually:
- Click the advertiser;
- Click They uploaded or used a list to reach you;
- Click Don't allow.
- Go back to the Manage info tab;
- Under Ads shown outside Meta, click Ads in other apps;

- Click Don't allow us to show you ads in other apps;
- Under Ads shown outside Meta, select Ads about Meta;
- Select Don't use my activity to show me ads about Meta;
- Click Confirm.
Please note: You'll still see ads, but they won't be based on your data.
How to defeat spammers and trolls
What for: To keep your peace of mind.
Instagram automatically hides comments it identifies as offensive or inappropriate, such as those containing spam or self-promotion. If spammers, trolls, or other bad actors still get through, you can enable stricter filtering to detect inappropriate comments by both direct and indirect signs.
To customize comment filters for posts and reels:
- Click the three-stripe icon in the lower left part of the screen;
- Select Settings;
- Under How others can interact with you, click Hidden words;
- Toggle on Hide Comments;

- Toggle on Advanced comment filtering so Instagram automatically hides more comments it identifies as undesirable;
- Toggle on Hide Message Requests to apply that filter to both comments and message requests.
Additionally, you can enable advanced comment filtering by creating a list of forbidden words, phrases, numbers, and emoji:
- Under Hidden words, click Manage custom words and phrases;
- Enter words and phrases you find unacceptable, separated with commas — comments containing these will also be held for review;

- Click Submit;
- Toggle on Hide comments;
- Toggle on Hide Message Requests to apply that filter to both comments and message requests.
Please note: Comments hidden by Instagram's algorithms will be visible to everyone except you. Comments caught by the blocked words and phrases filter will remain visible only to the author. To review and approve any comments you consider harmless, review the hidden comments below each post.
What for: So you can avoid running into unwanted people.
If you want to stop communicating with a specific user, you can block them. After blocking, you will automatically unsubscribe from each other (if you were subscribed), and all their likes and comments of/on your content will disappear.
Blocked users will not be able to view your profile, like or comment on your content, or send you direct messages. The user won't be told you've restricted interaction with them specifically.
To block a user:
- Go to this user's page;
- Click the three-dot icon next to the username at the top center of the screen;
- Click Block;

- Click Block again to confirm.
To review the list of users you've blocked or unblock someone:
- Click the three-stripe icon in the lower left part of the screen;
- Select Settings;
- Under Who can see your content, click Blocked;

- To unblock a user, click Unblock to the right of their profile picture and name.
What for: To remove irrelevant comments.
If you have a public profile, all Instagram users can comment on your posts by default. Spammers and trolls often take advantage of this.
To limit comments on your future posts, reels, and stories:
- Click the three-stripe icon in the lower left part of the screen;
- Select Settings;
- Under How others can interact with you, click Comments;

- Choose who can comment on your posts:
- People you follow;
- Your followers;
- People you follow and your followers.
For specific existing posts, your only option is to disable commenting entirely:
- Go to your profile;
- Open a post;
- Click the three-dot icon in the upper right corner of the post window;
- Select Turn off commenting.

To disable commenting for an individual post while you're creating it:
- When creating a new post after applying the filters, click Advanced settings;
- Enable the Turn off commenting option.
Please note: If you set your profile to private, only approved followers will be able to comment on your posts.
What for: So that you are not bothered by people you do not know.
By default, everyone who sees your stories can respond and react to them. Responses and reactions are displayed in personal messages, which means that if your stories are public, ill-wishers and advertisers can use this feature and flood you with spam and unpleasant messages.
To prevent strangers from responding to your stories:
- Click the three-stripe icon in the lower left part of the screen;
- Select Settings;
- Under How others can interact with you, click Messages and story replies;
- Click Story replies;

- Choose how to limit:
- People You Follow: Only these users will be allowed to comment on your stories;
- Off: No one will be allowed to comment on your stories.
What for: So that trolls and advertisers don't bother you.
Instagram users can tag you in their photos and reels. Such posts automatically appear on your profile and become visible to all users. This function can also be used by ill-wishers and spammers. If you don't want just anyone tagging you in their posts, restrict that setting so you can manually approve every tag yourself.
You can also limit who's allowed to mention you with a link to your profile in their stories, comments, live streams, or captions:
- Click the three-stripe icon in the lower left part of the screen;
- Select Settings;
- Under How others can interact with you, click Tags and mentions;
- Choose how you want to limit tagging:
- Allow tags from people you follow;
-
Don't allow tags.

- Click Manually approve tags;
- Toggle on Tag options.
- Choose how you want to limit mentions:
- Allow mentions from people you follow;
- Don't allow mentions.
What for: To prevent others from using your content for their own ends.
By default, other Instagram users can add your content to their own posts, stories, and reels, or share them in direct messages with others. To keep ill-wishers and trolls from taking advantage of this — and to make sure your content doesn't end up with total strangers — block people from using, sharing, or remixing it. Additionally, you can opt out of ad usage, downloads, and direct links to your content:
- Click the three-stripe icon in the lower left part of the screen;
- Select Settings;
- Under How others can interact with you, click Sharing and reuse;
- Toggle off Story shares;

- To stop others from sharing your posts and reels:
- Toggle off Posts and reels to stories;
- Toggle off Reposts on posts and reels;
- Select Off under Website embeds to stop others from displaying your posts and profile outside of Instagram;
- Toggle off Featured content requests to stop businesses from sending you requests to display content you've posted in Meta services.
What for: So that your followers don't upset you.
If someone is bugging you or just getting on your nerves — but you can't or don't want to go full block — set up individual restrictions for them instead. Once you do that, they won't be able to see if you're online or if you've read their messages. Their DMs will also get filtered and tucked away in your message requests so you can moderate them. Only you and that user will be able to see their comments on your content until you decide to approve them.
Plus, they won't be able to use your content for their own — no reposting, no remixing, and no mentioning or tagging you in their posts.
To set the restrictions:
- Navigate to the profile of the person with whom you would like to minimize interaction to a safe minimum;
- Click the three-dot icon next to the username at the top center of the screen;
- Click Restrict;

- Click Restrict account.
What for: To avoid spammers.
When someone sends you a private message for the first time, you first receive a message request from them, which is displayed in the corresponding tab of the personal messages screen. To start chatting with this person, you need to accept their request first. You'll still see the message text, though.
If you're in no mood to see messages from total strangers or deal with spammers and trolls, you can limit the ability to send you message requests or add you to group chats:
- Click the three-stripe icon in the lower left part of the screen;
- Select Settings;
- Under How others can interact with you, click Messages and story replies;
- Go to Message controls;

- Select an option under Who can send you message requests:
- Your followers;
- No one.
- Under Who can add you to group chats, choose People you follow or have messaged before.
How to hide posts from unwanted people
What for: So your stories are visible only to those for whom they are intended.
By default, your stories are visible to all followers. However, you can stop specific users from viewing them. This can be helpful if you use stories to post personal photos and videos that you do not wish to share with everybody.
To configure the visibility of stories:
- Click the three-stripe icon in the lower left part of the screen;
- Select Settings;
- Under Who can see your content, click Story and location;
- Click Hide story and live from;

- Choose followers you want to hide your stories from.
How to prevent your personal data from being exposed
What for: So no one can find out who's interested in your content.
By default, the like and share counts are visible under each of your posts. This information is visible to everyone if your profile is public, or only to your followers if it is private.
This data doesn't just indicate how popular your content is; it also reveals exactly who is interested in your posts, how frequently they engage, and how your content spreads across the platform. If you prefer not to share this information, you can hide the like and share counts for each individual post.
To do this for an existing post:
- Go to your profile;
- Open a post;
- Click the three-dot icon in the upper left corner of the post window;
- Click Hide like count to others.

To do this for a new post:
- When creating a new post after applying the filters, click Advanced settings;
- Toggle on Hide like and view counts on this post.
What for: So nobody can find out what you've been searching for.
Instagram stores your search queries on the platform and records of the user profiles you visit. If somebody gets a hold of your device, they can use that information to figure out your interests and preferences. To prevent this, clean up your search history from time to time:
- Click the magnifying glass icon in the lower part of the screen;

- Click Clear all below the search bar or the cross next to the queries you want to delete.
What for: To reduce the risk of data leaks.
If you've connected other sites or apps to Instagram — to find followers, count likes, and so on — they may have access to your profile info, your name, your profile picture, the e-mail associated with your profile, images and videos you posted, and your follower and following lists.
In some cases, they may also be able to like posts and follow or unfollow accounts on your behalf. It's a best practice to periodically clean up your list of third-party apps and services. This helps prevent unauthorized activity in your account and reduces the risk of a data breach.
To revoke the access of apps to your account:
- Click the three-stripe icon in the lower left part of the screen;
- Select Settings;
- Under Your app and media, click Website permissions;
- Click Apps and websites;

- Delete all apps on the Active tab.
What for: To prevent cybercriminals from getting hold of them.
By default, your Instagram stories are available to followers for 24 hours and then archived. That way, anyone who snoops in your account could end up seeing content that was never meant for them. To avoid this:
- Click the three-stripe icon in the lower left part of the screen;
- Select Settings;
- Under Your app and media, click Archiving and downloading;
- Toggle off Save story to archive.

What for: To stop showing everybody when you are online.
By default, Instagram shows when you are online or the last time you went online to your followers and users to whom you sent direct messages. When you're online, people who want something from you can track your status and flood you with messages.
Additionally, some of the users you approve as followers but don't know personally may be scammers. By following your status over a period of several days, they'll see when you are likely to be offline and unable to respond promptly to a cyberattack.
To stop showing your activity status:
- Click the three-stripe icon in the lower left part of the screen;
- Select Settings;
- Under How others can interact with you, click Messages and story replies;
- Click Show activity status;

- Toggle off Show activity status.
Downside: By hiding your status you will also be unable to see the activity status of your followers.
What for: To prevent unwanted people from finding your profile.
Instagram recommends your profile to users with similar interests by showing information about your account in search results and news feeds of other users. To exclude your profile from suggestions and search results, disable this feature:
- Click the three-stripe icon in the lower left part of the screen;
- Select Settings;
- Under How you use Instagram, click Edit profile;
- Toggle off Show account suggestions on profiles;
- Click Submit.

Downside: You will also stop seeing suggestions to follow accounts of other users.
What for: Not to appear in ads.
By default, Instagram shows information about your ad-specific activity to your mutual followers. For example, the service notifies others if you like a corporate profile or a specific product. You may not want some people to know what products and services you like.
To hide such information from other users:
- Click the three-stripe icon in the lower left part of the screen;
- Select Settings;
- Click Accounts Center in the menu on the left;
- Click Ad preferences. You'll land on the Customize ads tab;
- Go to the Manage info tab;
- Click Social interactions;

- Click your account name;
- Under Who can see your social interactions alongside ads for this account? select Only me.
What for: To prevent cybercriminals from getting hold of your personal information.
If your profile is public, all your posts are visible to all Instagram users by default. Search engines can also include your posts in search results.
Information in your posts may be used against you. For example, information about your personal life can help telephone fraudsters to make up a convincing story in order to steal money from your bank accounts. To make your posts visible only to your followers, switch your account to private:
- Click the three-stripe icon in the lower left part of the screen;
- Select Settings;
- Under Who can see your content, click Account privacy;

- Toggle on Private account;
- Click Switch to private to confirm.
How to improve your Instagram experience
What for: To avoid distractions.
By default, Instagram sends you notifications for all events and interactions, as well as service messages and ads. If some notifications distract you, disable or mute them.
To temporarily turn off all push notifications at once:
- Click the three-stripe icon in the lower left part of the screen;
- Select Settings;
- Under How you use Instagram, click Notifications;
- Click Push notifications;
- Toggle on Pause all;

- Choose how long you'd like to pause notifications for;
- For a granular setup, click Off for each event type or subtype.
To customize e-mail notifications:
- Click the three-stripe icon in the lower left part of the screen;
- Select Settings;
- Under How you use Instagram, click Notifications;
- Click Email notifications;
- Click Off for options you want to disable:
- Feedback emails;
- Reminder emails;
- Product emails;
- News emails;
- Support emails.
Please note: To stop Instagram from sending promotional notifications, you need to disable push notifications for product announcements and feedback, as well as product and support e-mails.
What for: To see only what you like.
Instagram offers its users a ton of diverse content, but some posts can still be unpleasant, for example, they may contain scenes of violence or substance use. The platform considers this kind of content inappropriate by default. You can cut down on how much of it appears in your feed, search results, Explore and Reels, and on hashtag pages:
- Click the three-stripe icon in the lower left part of the screen;
- Select Settings;
- Under What you see, click Content preferences;
- Click Sensitive content;
- Choose Less.

How to keep your data from being stolen
What for: To back up your important data.
Instagram collects and stores a lot of information about you. This is your profile information, activities (posts, comments, likes, and other), and all your settings. If your account is stolen or blocked, this data will be lost.
To prevent this, you can request and download an archive of your Instagram data. Note: It may take up to four days for the ZIP archive to appear after your request. You'll get an e-mail notification as soon as it's ready.
To download your Instagram data archive:
- Click the three-stripe icon in the lower left part of the screen;
- Select Settings;
- Click Accounts Center in the menu on the left;
- Click Your information and permissions in the menu on the left;
- Select Export your information;

- Click Create export;
- Select your Instagram profile;
- Select Export to device;
- Select the data to download, date range, file format, and media quality;
- Scroll down and click Start export.
Please note: Instagram doesn't delete data it has collected on you unless you're deleting your account. However, if you are a citizen of the European Union, you can demand that Instagram remove your data pursuant to Article 17 of the General Data Protection Regulation (GDPR). Instagram is obligated to take steps to remove the information you indicated even if it has been transferred to third parties and is stored by them. Within a month, the social network will send you a progress report or the reason why your request has been denied (the list of possible reasons appears in Part 3 of Article 17 of the GDPR).